December 16, 2011

How to take great Holiday Photos

Well it’s that time of the year again, Christmas season. For some us that means trying to squeeze in some time to get out with the camera and shoot some of those special outdoor Christmas light displays or maybe it’s just getting photos of the family on Christmas day. A lot of you might be trying out that new camera with the hopes of getting some great photos. But either way, whether you are photographing the symbolic subjects of the holidays or your friends and family, getting creative with your composition certainly cannot hurt. This means that by paying special attention to how you organize the various elements in each photo, you too can create your own set of great holiday memories.  


For Better Family and Group Portraits

The most important thing to keep in mind when photographing groups and families is this: you absolutely must take a lot of photos. There is often a great deal of pressure when photographing groups. A lot of people complain about having their picture taken and want the experience to be over quickly. Plus, you need to work quickly in order to get the job done within the limits of their patience and to try keep the experience as fun and friendly as possible. Since there is always someone blinking or looking off to the side or facing another member of the group, having a large number of photos will give you the best chances of catching everyone looking their best.

Shoot First, Ask Questions Later

Especially if your subject is a child opening a gift - or playing with a gift for the first time - you know that within a split second, the scene can change. There are often just a few brief moments when that "magic spark" appears. Of course this means having your camera on hand and the batteries fully charged and its always a good idea to have back-up batteries ready also. After all, you can't capture the moment if you don't have your camera turned on and ready to go. Remember, you have to be ready to press that shutter button in a moment's notice, anticipating when the magic spark will surface. If you have a digital camera that suffers from a bit of a delay when taking the picture, then you will have to become even more intuitive and skilled at anticipating the moment. Another good tip; make sure you have enough space on your memory card and carry an extra card with you. Too often people will run out of space and either have to delete some photos or end their shooting for the day. Remember, these days’ memory cards are very inexpensive, so pick up an extra one and you’ll be glad you did.  

Fill Your Frame

One of the most common mistakes I see in Christmas photos (or any party or event) is that people often end up with shots of their subjects off in the distance on the other side of a room with lots of space all around them. Fill your frame with your subject either by using your zoom or just getting up and moving yourself in closer. While this is one of the simplest tips I ever give it is one that can have the most profound impact on your shots. Try it out, you’ll be amazed.
Don’t Forget Your White-Balance
Now if your totally new to photography, your probably shooting in JPEG format with your camera set to auto and most digital cameras do a pretty good job with auto-white balance, but if you want to get better photos, try setting to white-balance. If you are shooting in RAW mode, you know you can always go back and change it afterwards if you forget.
Photographing Christmas Lights

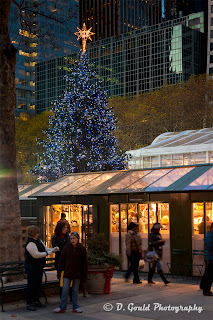
The best time to shoot is before it gets totally dark, plus arriving around sunset will give you time to plan your shot before the good light happens. Try to compose your shots with as much sky as possible, getting down real low. Then, once you get your photo framed, set your white-balance to Tungsten as if you were shooting indoors. All those little bulbs are tungsten balanced and as an added bonus your sky will look even better. Needless to say, you’ll need a way to steady your camera, preferably a tripod or mono-pod or even a beanbag for those long exposures. Plus a remote trigger or cable can come in real handy. Shoot a test shot every minute or so constantly checking the LCD. Somewhere between sunset and full dark your Christmas lights and the ambient light with start to mix beautifully. Usually you’ll have about a 10-minute window with nice light. After that, the good light will fade very quickly and you will know it is gone when your photos start looking like the "bad light" photos you used to take. 

Bonus Tips:

If you plan to use flash, nothing screams point-and-shoot like using an on-camera flash. Red-eye reduction is nice, but a shoe-mounted flash is so much better. When shooting indoors, not only can you bounce off of a wall or ceiling you can add a diffuser and make it hard to know a flash was used at all. Of course you might be able to avoid using flash at all by using a nice wide aperture like f2.8 or f/4 and bumping up your ISO a little, but a little fill-flash helps to lighten up your shadow areas and can really add some dimension to your photograph.

Remember, its always a good idea to plan ahead, maybe even making a check list of the things to remember like batteries, extra flash cards etc. Another good tip if you already own the camera, read and re-read your manual and get to know it even better. I can’t tell you how important this is.

Well until my next post, I hope you all have a very safe and happy holiday season and remember, as always, keep shooting and have some fun!

November 10, 2011

Creating Droplets to Run Actions in Photoshop

Have you ever wanted to email someone a bunch of images, but they were shot in RAW and you didn’t want to convert them into JPEG’s one by one? Or maybe you just want to send proof’s before you do your final editing? This tutorial specifies RAW files but it can also be used on other types as well. Droplets were designed to save us time when doing tasks repetitively.


This post is for those of you who have never used or perhaps never even heard of Droplets before. Droplets are one of those nice little features inside Photoshop that most people don’t know about. They are little applications that sit outside of Photoshop and run actions for you automatically, almost like the Batch command. Now you can create Droplets to do all sorts of things, but in this post I’ll show you how to create one that will let you drag-and-drop an image (or a whole folder of images) onto a droplet that will change the color space, the file size and then save them as JPEG’s in a favorite folder – all automatically! You do need Photoshop to create a droplet, but you don’t have to know how to use Photoshop to run one. Stick with me; I’m sure you’ll like this tutorial.

Step One: Open a RAW file in the Camera RAW panel. For this step, make sure your image is in landscape orientation, if it isn’t, open one that is. Also, make sure it will open in 8 bit mode. If you don’t know how to tell what mode it will open in, look beneath the preview window and it will say either 8 bit or 16 bit. If you have to change it, click on the blue bar underneath the photo and you’ll get a dialog box that will let you change it there. Once you change it, all your RAW images will open in 8 bit mode until you change this back. (See photo) Now click the Open Image button to open it in Photoshop.

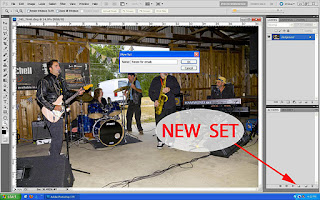
Once it opens in Photoshop, open up the Actions panel (Window > Actions). All of my resizing Actions are kept in a separate set, so click on the Create New Set icon at the bottom of the Actions panel. In the dialog box, name it Resize for emails. 


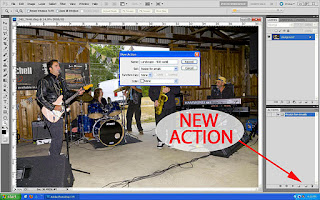
 If you don’t want to create a new set just click on Create New Action instead and then name it Landscape – 900 wide. Then hit the Record button.


Step Two: Now go up to the Image menu and choose Image Size. Change the width to 900 pixels. If the Height value doesn’t change automatically, make sure the checkbox for Constrain Proportions at the bottom is turned on. Don’t worry about resolution. Now click OK to resize the photo.


Now go over to the Edit menu, scroll down to Convert to profile and change the profile to sRGB IEC61966-2.1. Finally, go to File>Save As and when the dialog box opens up, change the format to JPEG and click Save. Don’t worry about where you save it; anywhere will be fine for now. 


Now you should get another dialog box for JPEG options, I use 5 Medium to keep my file sizes small (usually around 100 - 150 kb’s) but you can use whatever you choose, The larger the size, the higher the quality.


Now just click the Stop button on the bottom of the Actions panel.


Now you should have 3 steps in your new Action: Image Size, Convert to Profile and Save. Now we’ll create our droplet.


Step Three: Go up to the File menu, scroll down to Automate and choose Create Droplet. 


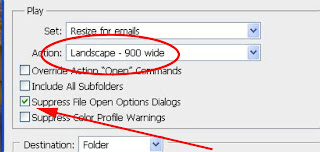
The Create Droplet dialog box will open up. (See photo) The first step is to click the Choose button at the top to tell Photoshop where to save your droplet. This is not telling Photoshop where you want to save your images, instead you’re telling it where to save the Droplet Icon. I put mine on the desktop. Name this droplet Landscape and click Save.


Step Four: In the Play section, it asks you to choose an action to run. In this lesson, we’ll use the same action we created in Step One. Since we’re opening RAW files (RAW files automatically open in the Camera RAW dialog) turn on the Suppress File Open Options Dialogs checkbox so we won’t see the Camera RAW dialog every time. Important Tip: Make sure your action you’ve included in this droplet always exists or this droplet will not work anymore!


Step Five: Under the Destination menu, select Folder, this is where your final images will be stored when your Droplet has finished running. I have a folder on my desktop called JPEG’s for Email and that works for me. You can pick any folder and now all your images will be placed there. Nice huh? Now back in Step Two when we recorded the Action, we saved the image remember? Well, we really don’t want every image to be saved with the same name we did in that step, so check the Overide Action “Save As” Commands to override the location/name we used there and use the original (it’s OK because it’ll be a different file format) In the File Naming section, you can choose to generate a custom name for each image, but I personally leave mine at the defaults. I can rename them later by using the Batch command if I need to.

Step Six: Now some of you might be using a Mac and a PC at the same time and want to use this Droplet on both machines, choose as many Compatibility settings as you want. Usually if you’re working on just one system, you’ll leave the default checkbox for your operating system selected.

Important Tip: If there’s an error, you don’t want to find out after you’ve ran this Droplet on a hundred images, so leave the default Stop for Errors setting turned on. That way if something messes up, it will stop and let you know about it!


Step Seven: When you’re done, click OK to create your Droplet. Nothing will happen yet because you haven’t ran any Actions yet, but if you check your desktop you will see a new Icon called Landscape. (See photo)


Step Eight: Now, anyone who knows how to drag-and-drop can use this Droplet. To use it, simply drag an image (or even a whole folder of images) onto the Droplet Icon on your desktop. If Photoshop isn’t open, it will launch itself and run the batch process you specified in Step Four. When it is done, it will put your images in the folder you chose. Remember to make sure all your images are in Landscape orientation. To create one for Portrait mode, go back to step one, open a RAW image that is in Portrait orientation instead and when you have to name your new action, call it Portrait – 600 wide. In step Four, choose the new action instead. You shouldn’t have any problems. To try it out, just get a few RAW files and drop them onto the droplets and then check your destination folder.......Nice huh?

Remember, you can create Droplets to do many repetitive things for you to make your work flow easier. I hope you’ve enjoyed this tutorial and find it useful. Feel free to pass it on and remember, as always, keep shooting and have some fun!

October 17, 2011

Getting your photos on the Web

These days if you’re a photographer, a clean, professional-looking website or blog is a must. This could be something to help you to promote your business or services, or maybe a place to display your work and sell your images. But for most people, the thought of having a site that displays your work like a pro seems either too expensive or too hard to create. Face it, you have to keep up with the competition or get left in the dust.

Now some people just want to show off their photos and you can do that on sites like Flick’r, Webshots, Facebook or the new Google + just to name a few and it won’t cost you a dime, but if you already have an established business or are just starting a business, you need a web presence.

In the past it used to cost you quite a bit to get started online. First, you needed to hire someone to create and design your site. Then unless you knew coding and HTML you still needed them to edit and make updates and changes to it for you. Finally, you needed a hosting service to go online. These costs could add up quickly and could get rather expensive.

Now you might know something about web design already, but most blogs these days are created in a program called Word Press. Word Press is nice because it is pretty easy to understand and it’s a totally free program, just download a copy and you’re ready to get started. Word Press was actually created in 2003 and as of February 2011 it has been download over 32 million times! The beauty of the program is you don’t have to know how to write any PHP or HTML code or have a formal education in web design skills. It is by far the most popular CMS (content management system) in use on the Internet and has helped bridge the gap for many people to create and edit their own sites without having to go back to school. Don’t get me wrong, it can be helpful to have some basic editing skills, but there are a ton of free sites online to help you with that once you get up and running.

If you have ever read any of my blog posts, you’ll know I’m a big fan of NAPP, (the National Association of Photoshop Professionals). NAPP is part of the Kelby Media Group, who also owns and operates Kelby Training and sponsors the Photoshop World Conferences. If you’re into photography and editing your photos in Photoshop, then these are the places to learn. Check out my May 2011 post for more info on NAPP.

Recently, Raphael ‘RC’ Concepcion, one of the curriculum developers over at NAPP, has written a book called “Get Your Photography on the Web”. The book has been a huge success with photographers everywhere. If you are ready to make the next move and get yourself a truly professional looking site up and running quickly without breaking the bank, then this book is for you.

In the book RC walks you through the whole process from start to finish. Like all books put out by the Kelby Media Group, they are filled with tons of photos and easy to follow diagrams. This book was designed to help people create a website and get it on the Internet as painlessly and as cost effectively as possible.

Not only do you get a step by step method for getting yourself online, you also get access to free templates for use on your own website. He has also added resources so that you will be able to sell your images immediately without having to learn how to program a shopping cart onto your site. Included are some real examples of other photographer’s blogs and websites along with their own personal stories. He’s dedicated another whole chapter on using plug-ins and for using and installing Google analytics (to keep track of your traffic) These days more and more people are getting into DSLR video and he even shows you how to add flash based gallery on your site with FTP, plus a ton of other great information.

This book takes you through an easy step-by-step process so you can build your own site from the ground up and have it look like you paid someone a lot of money to do it for you. “Get Your Photography on the Web” can be found in all fine bookstores or online at Amazon or at Kelby Training. I hope you find this article helpful and remember, keep shooting and have some fun!

September 16, 2011

Super Rechargables - How to get the most out of your batteries!

I’m a big fan of using off camera flash (Speedlights) and love experimenting with various lighting set-ups. My goal is to get my lighting down to a science, unfortunately when your using Speedlights you will quickly find out that they can really drain batteries in difficult lighting set-ups. For example, if you’re using your flash unit as a main light and have to shoot at f/8 or better to get decent depth of field or when using high-speed sync at full power you can easily eat up the charge in your disposable batteries in no time.

Now granted, if you are familiar with lighting and power ratios, you know that by raising ISO you can lower your flash output to one quarter or one eighth power and then you can get hundreds of pops out of your flashes, (check out the diagram) But at the end of a typical wedding, you will still go through a lot of batteries and that can get expensive. Usually, we tend to think getting rechargeable batteries, Nickel-Metal Hydride (NiMH) to cut down your costs, but the average (NiMH) rechargeables really don’t hold up that long. You’ll find that after they’ve been recharged 20 or 30 times, the recycling time between pops is much slower. When shooting a wedding, I usually try to get all my batteries charged the night before, but you’ll find that they will lose quite a bit of power overnight. What to do now?


Well, I read a lot of blogs and wanted to see what the Pros use out in the field in their flash units. I knew I needed a better solution than the plain rechargeable batteries that I had been using. I found one of the most popular products on the market today is the slow-discharge type battery. I personally use the Sanyo Eneloop hybrid Nickel-Metal Hydride (NiHD). Unlike plain rechargeable batteries, these batteries actually come pre-charged when you purchase them. Plus they maintain over 80% of their charge even after sitting around for over a year! Another nice feature is that they can be recharged up to 1500 times. What that means to you or me is, even if you recharge them twice a week it will take 10 years to reach 1000 cycles!


Now your probably saying to yourself that these must be expensive, but get this, a 4 pack of pre-charged batteries is only around 10 bucks or about the same price as a 4 pack of Energizer rechargeables! But you do have to be careful with how you charge them, some chargers can hurt these batteries and shorten their life span. I dug around online again and found a really highly rated charger, the Maha C801D made by PowerEX. I purchased mine through a company called Thomas Distributing because they actually had great customer reviews and the best prices around. PowerEX puts out their own line of batteries but I found that the Sanyo’s were rated even higher. The model I purchased can charge up to 8 batteries at the same time in under an hour. Plus each battery can be at a different level of charge and the charger actually knows this and charges accordingly! So it will charge your batteries correctly each and every time. You will never over or under charge your batteries again because the Maha will shut off that cell when the battery is fully charged. The charger also features a slow charge setting. The slow charge will automatically drain all the juice from your battery then fully recharge them. The rapid charge does exactly what the name implies; it fully charges your batteries in under an hour! So you can load the charger with 1 battery or up to 8 batteries and it will charge them all perfectly. On the front face of the unit are little power level guides so you know when your batteries are all charged up and ready to go. This charger even recognizes alkaline batteries and won’t try to charge them and risk hurting the unit. With the Maha C801D you can even charge both AA’s and AAA’s at the same time.

Now I aimed this article at off-camera flash fans, but these batteries can be used for all sorts of devices ranging from flashlights to digital cameras, basically anything that uses batteries. The Eneloop batteries are available in all sorts of sizes, not just AA or AAA’s. You can get C, D and even 9V batteries and you can purchase combo packs that come with their own charger if you prefer. If you’re like me and use batteries a quite a bit, maybe its time to check into some of these slow-discharge batteries and save yourself some money in the long run. These days I’ve always got fully charged set of batteries when I need them...........Nice huh?

Hope you find this article useful and remember, keep shooting and have some fun!

August 27, 2011

Sharpening Clouds

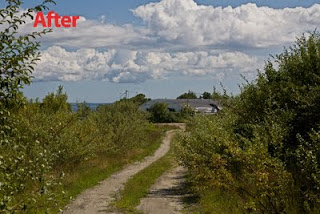
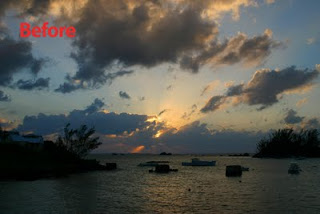
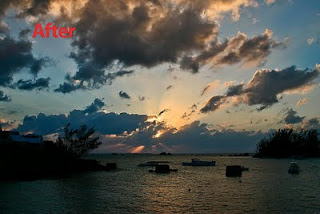
Have you ever had a photo of a nice sunset or a landscape with some clouds in it, but when you open the photo up, you wish the clouds had a little more punch to them? 

I have a technique I use on almost all of my photos with clouds in them to add some extra punch. It’s a pretty quick process and the results make a nice improvement almost every time. 

The beauty of this technique is, all this is done on its own layer so if want to reduce the effects, you can just lower the opacity and if you still don’t like the effect, you can trash the layer. Either way, its just a few mouse clicks to adjust or correct your photo.


Grab one of your photos with a few clouds in it and follow along.

1. Whenever I work on a photo I always start by making a copy of my background layer (just in case) so click Cmd or Ctrl + J.
2. Now go up to the filter menu, click on it and scroll down to Other, then click on High Pass.
3. When the High Pass dialog box comes up, slide the slider until your clouds look really sharpened with lots of definition in your clouds. You don’t want to go overboard because it will make your photo look really funky. Every photo will be different so feel free to play around with your settings. When you’re done tweaking it, click OK.
4. Now I desaturate my new layer, just hold down Cmd + U or Ctrl + U to bring up your Hue and Saturation dialog box, and then drag your saturation slider all the way to the left to remove all the saturation.
5. Now go up to the top of your layers panel and change the blend mode of our High Pass layer to either Overlay or Hard Light, I usually prefer Hard Light myself.

Now depending on the photo you use, you might have to make some other minor adjustments to parts of your photo to either hide the sharpening effects or paint in the effects. This is actually quite easy to do using a layer mask and a nice soft brush.

 
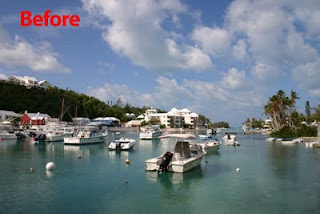
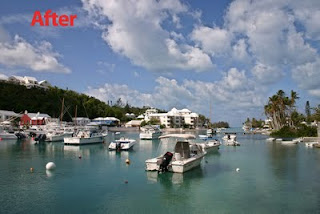
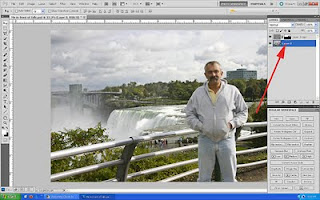
Most of the time it’s easier to use a black mask and ‘conceal’ all the sharpening, then I use a white brush to paint in the sharpening on just my clouds. To get a black mask, hold the Alt key down before you hit the mask button on the bottom of the layers panel. (the mask button is the third one in from the left side of the panel) Make sure your painting on the mask by clicking on the mask box. Remember, if your effects are still a little too strong for your taste, just lower opacity to your own liking. In this image, I painted in the effects with a nice soft white brush. I use a Wacom tablet so I can paint with various degrees of pressure, but you can do this with a mouse too.


When I get it where it looks good to me, I tap on the top layer to make it active and then hold down the Ctrl + Shft + Alt keys and tap the letter E to make a flattened copy of all my layers right on top of my layers stack. Then I hit Ctrl + A to select it, (you’ll see the marching ants around it) then hit Ctrl + C to make a copy of that layer.


Now go over to the File menu, and click New. This will open a new blank document that will be the same size automatically. Now just hold the Ctrl key and tap V to paste your copied image into your new document and you’ll see a new single layered file, then just save your new image as you like. Now you can either save the original file with your changes or just close it out.

Now that you know this little technique you can use it to add a little punch to your clouds in own photos. Don’t be scared to try this with other photos also. It works great on images when you want to selectively sharpen only specific areas in your photos or to add some extra drama to your images. Try it yourself on a few images, the results might amaze you!


Remember, as always, keep shooting and have some fun!
July 25, 2011

New England Camera Club Conference - 2011


Each summer, one of the things I really look forward to is attending the NECCC conference held at the University Of Massachusetts campus in Amherst Mass. NECCC stands for the New England Camera Club Council. Every year the NECCC holds a three-day conference for people that are into photography. The council itself is a non-profit umbrella group of about 80 camera clubs in New England, which was established in 1937 and became so popular that it was officially incorporated in 1963. If you’re into photography, then this is the place to go. It is New England’s version of Photoshop World.


I had been into photography for many years but I had never even heard anything about the NECCC until I joined a local camera club (Stonybrook Camera Club). It was through my club members that I found out what the conference was all about and I instantly wanted to attend it myself. I have been to Photoshop World a few times and really enjoy learning just about anything to do with photography, camera’s etc.


I was very lucky because a few of the members of my club were also presenters and teachers at the conference (as well as being very gifted photographers themselves) Each year my club usually has about 20 or more members that attend the conference and its a lot of fun hanging out and talking shop all weekend.

For me, the conference is about 120 miles away from my home, so like most of the attendees we stay right at the campus in the same dorms used by the students during the school year. Very few students are on campus in the summer and for a minimal fee you can rent a room, with or without A/C. Some people choose to dine out during the weekend, but as an added convenience, the college opens one of the campus cafeterias for dining and offers various meal plans. I like this personally because I don’t have to drive anywhere and it gives me a chance to hang out with my club members and my fellow photographers.


Each year the conference offers classes and seminars on everything from printing and camera settings to subjects like flash photography and lighting. In addition to that, some of the big name equipment manufacturers like Canon, Nikon, Sigma, Tamron, Nik Software, Wacom, Epson etc have booths set up with reps there to answer any of your questions and also have a nice selection of the “latest and greatest” for sale. Some of them even hold classes to help people get up to speed on their equipment. You can even borrow some new cameras or lenses for the weekend or test some of the latest printers.


Classes on the Conference Schedule are rated according to your skill level, B for Beginner, I for Intermediate and A for Advanced. Every year they also offer shooting set-ups with live models (usually college students or faculty) either in a photo studio type environment or at various places around the campus. They also have set-ups for shooting exotic animals or birds, so there is usually something for everyone.

This year as always, they had a few of the big names teaching you their tricks of the trade, teaching how they got to where they are and how they stay ahead of the pack in this highly competitive field. Some of speakers/ presenters for 2011 included Ken Sklute, one of the Canon Explorers of Light, doing a show on sports photography. Eddie Tapp, also sponsored by Canon and a 2006 Photoshop Hall of Famer, doing a seminar on his digital process and back-up system. Adobe proudly sponsored Jane Conner-Ziser, and she showed her own workflow using ACR (Adobe Camera Raw) and Lightroom with her own personal tips and techniques.

I really enjoy the special presentations by some world-class photographers. This year, one of the feature artists was Wendell Phillips of Canada. His show consisted of some of his images from the Olympic games and his recent documentary from Africa, the Middle East and Asia. Another world-class photographer, Andre Galant, also from Canada, did a presentation on his own world travels and as an added bonus they also had Jack Reznicki back again this year to do two presentations, one called Copyrights and Copywrongs – Model Releases and other Legal Issues and another called Lighting and Visual Perception. The NECCC also features local professionals from the N.E. area doing various workshops and shows on how they succeed in the world of photography.


One of my personal local favorites is Sarah Musumeci. Sarah specializes in architectural and travel photography and photographs everything from Bed and Breakfasts in New England to major hotels and businesses in the New York and Boston areas. I like to mingle with the presenters and artists when I can and one of the people I met this year was Robert Harrington, a first time instructor at the conference and he taught a class on Off-Camera Flash and it was a big hit. All in all, the conference is a great time and is almost guaranteed to have something for everyone.


Usually the conference people do a special presentation on Saturday night in the main auditorium on campus, but this year the building was having some renovations during summer break so for their feature presentation, a popular local photo retailer, Hunts Photo and Video, sponsored a show with hot air balloons. On Saturday evening they had three balloons tethered next to a pond on campus and ‘fired them up” for an evening tethered glow. The following morning, very early, the balloons were scheduled to do a take off. Both viewings were a lot of fun and made for great photo opportunities.

This year, as always, the conference was a great time. The NECCC has a faithful following and is sure to be around for years to come. I’m sure that there are conferences similar to this all around the country and you owe it to yourself to go online and find one in your area.
Remember, as always, keep shooting and have some fun!
June 21, 2011

Creating your own light using Variable Neutral Density Filters

If you’re like me, I make the majority of my income from my so-called 9-5 job. Trouble is, it usually turns out to be more like 45-60 hrs a week and that severely cuts into my personal shooting time. You know the scenario, you get one day a week off and make plans to go shoot a particular location. But when the day comes, you can’t get there early enough or late enough in the day to catch the right light and just have to make the best of it.

Has this ever happened to you? Then maybe this article will help you too.

I was online one day reading a story about this photographer’s personal experience shooting with a Variable Neutral Density Filter. The author talked about using one of these filters and being able to shoot wide open at f1.2 and maxing out his shutter speed at 1/250, all at 2:30 in the afternoon! I had never heard of these before. Variable Neutral Density filters are very handy in situations where you need a slower shutter speed than what can be achieved by using your camera’s lowest ISO and stopping down the lens. I found out that with these filters you could reduce the light entering the lens from 1 to 8 stops (without affecting the color) just by twisting the end of filter. In other words you would use it like you would a circular polarizer lens and turn the end to let in more light or to block out light. In techie terms that meant going from a ND2 all the way to a ND400 in a single filter! Check out this little clip to see how it works.    Variable Neutral Density Filter


Well this started the wheels in my head spinning. I like to shoot anything with water; waterfalls, fountains, the ocean and I knew from experience that if you want your water smoothed out nicely, you usually have to be there really early (or on a very overcast day). Even timing it just right, most of the time you still had to use a 2 or 3 stop Neutral Density Filter so you that you could keep your open shutter long enough to blur your water without blowing out all your highlights at the same time. Then I thought about some other possibilities of where I could use these, like when I shoot a wedding and try to shoot the bride and groom in the mid-afternoon sun. Have you ever tried to minimize your depth of field at noontime, not an easy task huh? With these filters that problem is easily overcome, just dial down the density, pop it with a little flash, and presto - problem solved! Not only were they good for controlling depth of field and blurring motion, they were also useful for selective focus and Macro photography!


Well I always like a bargain and I decided to do a little research on these filters. What I found out was that these are getting really popular with people who shoot videos with their DSLR’s because they can shoot in the afternoon and still adjust their depth of field on the fly. I also found out that there were only a few companies that made these filters and they could get pretty expensive. Probably the best ones were put out by Singh-Ray and you could pay upwards of $400.00. But I continued to shop around online and came across a relatively unknown company called Light Craft Workshop, who manufactured the Fador Mark II - Variable Neutral Density Filters. For me, my favorite lenses are 77mm and I found out that I could save a couple hundred bucks and get one of these for $199.00. Don’t let that scare you, I found you could get a 58mm for as little as $109.00. Like everything else they come with mixed reviews and some people said that these types of filters could soften your images sometimes, but I really haven’t found that to be the case and I can always selectively sharpen if I feel the image needs it.

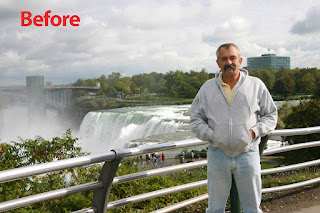
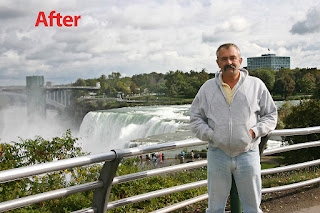
Take a look at the two images. On the one without the Fader ND filter, you’ll notice how I’m blowing out my sky and the water isn’t even softened yet. That was shot at f/8 at 1/50 sec. For the other image I repositioned my tripod and used the Fader ND. This was shot also at f/8 but at 0.8 sec, about a 5 stop of difference. Keep in mind that these waterfall photos were taken a minute or two apart, at about 2 pm with the sun almost directly overhead. To create this image, I opened it up in Camera Raw, cropped it a little and pumped up my blacks. Then I added some fill light to the rocks with an adjustment brush. Lastly, I adjusted the clarity, vibrance and saturation sliders to my liking. But now it looks like I was there around dawn! Of course to finish it off I’d bring it into Photoshop and tweak it here and there, but take a look at what this filter can help you do. Maybe you could use one of these in your camera bag too? I hope this article gives you some new ideas. Fader Mark II Variable Neutral Density Filter
Remember, as always, keep shooting and have some fun!

May 18, 2011

The value of a NAPP membership

This is actually an updated reprint of an article I posted in June 2009. I’m still a huge fan of NAPP and highly recommend joining NAPP to all my friends who are into photography.


If you’ve been shooting digital for a while, then you have probably experimented with some sort of photo software by now. Every Digital Camera comes with some software to help you process the images after you capture them. Some of the better cameras have their own version of software that does more than enough for the average shooter. But maybe you really enjoy playing around with your photos and want to learn more?

I actually got into Digital Photography about 11 years ago. Back then Digital Cameras were pretty new to the general public and I found that I really enjoyed playing around with my images after I shot them. I soon found out that when it came to editing your photos, the major player in photo editing was a program called Photoshop. Unfortunately a full version of Photoshop was expensive and I didn’t want to pay full price. So I shopped around online and found an unregistered copy on Ebay in my price range and I was off. Since then I’ve updated my copy a few times and am currently using CS5. As you might know, Photoshop can be very intimidating to the newbie, but I wanted to learn more, so I used to go online and check out anything and everything to do with Digital Photography.

One day I was in a local bookstore and picked up a copy of a magazine called Photoshop User and started browsing through it. I had never even heard of it before and I instantly fell in love with it. The magazine was filled with tips and tricks on learning Photoshop and even had tons of deals on photo gear and gadgets. But, the only way to get a subscription was to join NAPP for $99 per year. At that time, you got 8 issues of Photoshop User magazine which cost about $10 apiece if you purchased them at a bookstore, so that meant my net cost of joining was really only $19. Think about it, what can you actually get for $19 dollars these days anyhow? Here are just a few of the things you’ll find on their website. (Note: Starting in 2011 they now publish 10 issues a year at the same price) Since the time I originally posted this article they’ve added a quite few nice features aimed towards people who are new to either Photography or Photoshop. On the top right side of their websites homepage you'll even see links called 'Brand New to Photoshop' or 'Brand New to Photography'.

Tutorials
The NAPP member website has a section for text and video tutorials written or taught by some of the top names in the Photoshop education including Scott Kelby, Dave Cross, Matt Kloskowski, RC Concepcion, Corey Barker, Lisa Snider and a ton of others. As of the moment I am writing this blog post, there are almost 1500 tutorials.


Member Discounts
Let me just rattle off a few places that offer discounts to NAPP members… Dell, Drobo, Adorama, Mpix, Kelby Training, Hoodman, Corel Painter, onOne Software, MacMall, LensProToGo, Office Depot, B&H, and a horde of Photoshop software plug-in makers. I have used the one for B&H enough times to pay for my membership practically. At B&H they not only give you a discount but they include free shipping too! Nice huh?

Magazine Section
This is a very useful section for sure. In every issue of the magazine they have tutorials with downloads of the image files so you can work along with the article. In this section you can access past articles and tutorials as well.

Portfolios
The NAPP member website has a section for uploading images that you have created into a nice online portfolio that can be viewed by other members. It’s a nice way to check out other member’s photography.

Help Center
This is one of my favorite things about NAPP. Have you ever tried to do something in Photoshop or Lightroom that you just couldn’t get right? Ever had a question about camera gear or computer equipment that was driving you nuts? Just go to the NAPP Help Center and see if your question has already been answered before. If it hasn’t, then submit your question and they’ll email you with the answer!

Forums
This is the NAPP members community. When you register here you can post questions or comments of a variety of subjects like Photoshop Discussions, Graphics or NAPP classifieds, just to name a few. This is a great way to network with other photographers and designers.

H.E.L.P. - Quick Video Tips
HELP stands for How-To Educational Library for Photoshop. This is basically a help center to answer any questions you have regarding Photoshop by showing you a short video clip on the topic that you need help with. Just select the topic you need help with and a box will come up with associated topics to choose from with a short video tutorial. Nice huh?

Shortcuts, Brushes, and Styles
There is one page on Photoshop keyboard shortcuts, another with Patterns and Brushes and a third page with Actions and Styles. I use these resources all the time and they are always free to download and use.

NAPP Perks
There are additional perks that only members get. These perks include access to product reviews, the NAPP newswire, lots of freebies only available to members from various companies that make Photoshop plug-ins and other software. Plus you get access to the NAPP member forums. The forums are a massive resource that you can not only tap into but also contribute to on all topics relating to your Photoshop and photography passion. This is also a great medium to network with other members.

The NAPP Store
The NAPP store offers books, DVD’s, online training, and seminars at a reduced cost to members. In some cases we are talking about greater than a 50% discount! Once you become a NAPP member you will never buy another book at full cost again!
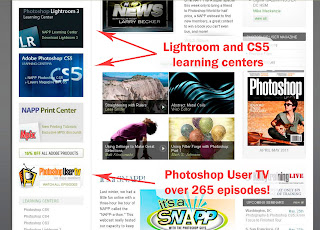
PhotoshopLightroom 3 and Adobe Photoshop CS5 Learning Centers
Now these sections are aimed at people just getting started in Lightroom 3 or CS5. They have a bunch of short videos describing features of both programs. Even people who’ve been using it for a while can pick a tip or two here.


Photoshop User TV
This is definitely one of my favorite perks from membership to NAPP. Not only do you get to view Photoshop User TV weekly, but you can also download previous episodes and watch them on your Ipod or your PC anytime. I’ve been watching the show since episode # 1 (Oct.24th 2005) and I always look forward to the next weeks show. They are now up to episode 266! Nice huh?


The fee for a NAPP membership is still only $99. Now factor in that you get 10 issues of Photoshop User magazine, access to members only forums, Online Tech Support, helpful product reviews, access to over 1000 Photoshop and Lightroom tips and tutorials and hundreds of product discounts. You also receive discounts for seminars, online training, Photoshop World tickets, books, DVD’s, not to mention and access to all the Photoshop User TV. You’ve got to admit; in this day and age this is an exceptional deal any way you look at it! It is almost like NAPP is paying YOU to join! Use this link and download a copy of Photoshop User magazine for free.

So what’s stopping you from joining? Click on one of NAPP links on my site and join today! And remember, keep shooting and have some fun!

April 23, 2011

Stripping Metadata the Easy Way

If you’re like me, you probably send photos and images all over the place via the Internet. I’m always sending photos off to customers or clients or to my email friends and family just for fun. Digital photography has made the way we share our photos very easy and just about everyone is sharing their photos these days. Let’s face it, it can be fun to show off your photos to people on the other side of the country or just across town, all in a couple of minutes.

Some people who own digital cameras don’t even know that their cameras record a variety of things automatically when you take the photo. Just about every camera records the Camera Make and Model, Shooting Date/Time, Shutter Speed, Exposure Program, F-Stop, Aperture, ISO, Lens, Metering Mode and most of them can even tell you if you used your flash! This info is called the Metadata and it can be very useful. Those of us in the field using Photoshop or Lightroom usually have our own Metadata Templates that we automatically embed into our files when we take them off our cards on import. For me, I only use three boxes in the Metadata Panel – Camera Data, IPTC and Description. There are a bunch more, but 90% of the time I don’t need them myself.

Some of this info is mainly for our own personal use, but other things like our studio name or website and email address’s can come in handy. It also helps us with archiving because by adding keywords it will help us find them easier on our computers when we start getting thousands of photos. It also helps us in keeping track of things like shooting dates or occasions. But for me, some of this is info that I don’t want to share with everyone on the Internet, so I like to remove all that info before I start sending any of my photos off into the big scary world.

Most of my work is finished off in Photoshop, so I’ve created all sorts of different Actions to help me do tons of different things that I do all the time without having to go through the whole process over and over. Here is a little tutorial that will take you through the process of creating an Action that will automatically remove all of your Metadata info with just one mouse click so you can send them off with a little more confidence.

In this first image, you can see all the different camera settings. You’ll notice it was taken with a Canon EOS 5D on 10/9/2010 at 3:20:36pm and all sorts of other data. I don’t really like to share this info, but because this info might help me to prove ownership if someone tries to use my images without my permission, I’ll keep it in my main file.


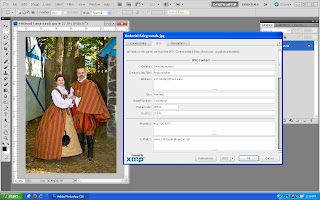
Now check out this second window. Notice all the new Metadata info, called IPTC. For purposes of this tutorial I’ve used fictional data, but you get the idea. Granted, sometimes I’m only sending a photo off to a family member or friend, but I still feel better when I remove this info.


The third tab, called Description, has places where I can add a description, rate the photo with one to five stars, add keywords and copyright status, notices, and info with links. You’ll notice on the bottom it also has other info, like the shooting date and time, format and a few other things I like. Lets get started:


Open any single photo in Photoshop, preferably a JPEG in sRGB mode so you can follow along. Now hold down the Shift + Ctrl + Alt and tap the letter I key to bring up the info on your image. You can also go under the File menu and click on File Info. This will also bring up the same dialog box. Click on all the tabs on the top of the box to see your info.

You’ll see how simple it can be to create an Action to strip out your Metadata with just one mouse click. In a future tutorial I’ll show you how to create Droplets so you can run these Actions on whole folders at the same time. Watch my blog for future tutorials.

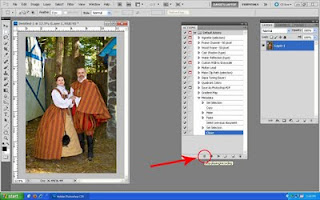
Now, go up under the Window menu and click on Actions to bring up our Action Panel. On the bottom of that panel, click on the icon next to the trashcan to create a new Action.

A dialog box will come up, name it Metadata, and click the dropdown menu beneath it and click the Default Actions folder. You’ll notice you can also add a Function Key to your Action and a Color, but we’re going to skip that this time. Hit Record in the top right corner to start recording and you should see a Red Circle on the bottom of your Action Panel now.


First we need to select the image. I’m a big fan of shortcut keys, so hold the Ctrl key down and tap the letter A key. You can also go under the Select menu and click on All. You’ll see the marching ants around your photo. Now hold the Ctrl key and tap the letter C key to copy your selection to the clipboard. You can also go under the Edit menu and click on Copy.


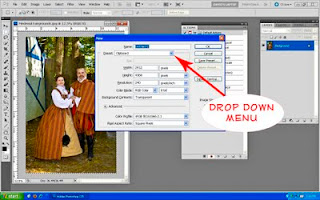
Now we need to create a new template for our image, this is easy to do. Hold the Ctrl key and tap the letter N key to create a new document exactly the same size as our original or go up under the File menu and click on New. This will open a Dialog box and you can just click the OK button and it will create a new blank document the exact size to paste our image into.


Note: if you have more than one image open in Photoshop, you’ll have to tap the drop down menu in the Preset box and tap on the name of the image you just copied.

Now hold the Ctrl key down and tap the V key or go up under the Edit menu and click Paste. Also, a lot of us shoot in a different color space in our cameras, so when you try to you paste your image, you might get a Profile Mismatch Dialog box asking if you want to convert to a different color profile. For the purpose of this tutorial click on Don’t Convert and click OK.


You should have two documents open on your desktop now. Click on the tab of the original image to make it active, you’ll see your marching ants. Now hold the Ctrl key and tap the D key to deselect the image and turn off the ants and then click the X to close it, we won’t need it anymore. This will leave you with our new image.


Now on the bottom of the Actions Panel, click the square box on the bottom next to the Red circle to turn off our recording. If you want, go and check out your File Info again you’ll see we just stripped out all that information.


Now you should have a copy of your original without any of the Metadata in it. If you want to, you can resize your new file now and then go up under the File menu and click Save As or just hold Ctrl + Shift and tap the letter S key. This will bring up another dialog box, choose your file format and a place to save it to and give it a new name if you’d like. Now close that file, and open your original. You should still have the Actions Panel open so just click the start arrow and play your actions.....Nice huh?

There you have it, a quick and simple way to make a duplicate photo, with all your Metadata stripped out with just one mouse click. I’m a big fan of anything that will save me time. I have a whole set of Actions that I use to strip Metadata, resize for the web, change the color space and even drop the finished images into special folders on my desktop, all with a single click of the mouse (or pen ) I hope this tutorial will help you out.
Remember, as always, keep shooting and have some fun!
 
© D. Gould Photography