 Well it’s that time of the year again, Christmas season. For some us that means trying to squeeze in some time to get out with the camera and shoot some of those special outdoor Christmas light displays or maybe it’s just getting photos of the family on Christmas day. A lot of you might be trying out that new camera with the hopes of getting some great photos. But either way, whether you are photographing the symbolic subjects of the holidays or your friends and family, getting creative with your composition certainly cannot hurt. This means that by paying special attention to how you organize the various elements in each photo, you too can create your own set of great holiday memories.
For Better Family and Group Portraits
The most important thing to keep in mind when photographing groups and families is this: you absolutely must take a lot of photos. There is often a great deal of pressure when photographing groups. A lot of people complain about having their picture taken and want the experience to be over quickly. Plus, you need to work quickly in order to get the job done within the limits of their patience and to try keep the experience as fun and friendly as possible. Since there is always someone blinking or looking off to the side or facing another member of the group, having a large number of photos will give you the best chances of catching everyone looking their best.
 Shoot First, Ask Questions Later
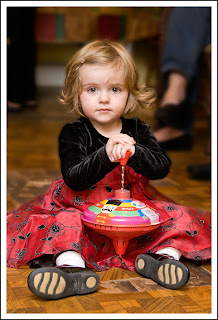
Especially if your subject is a child opening a gift - or playing with a gift for the first time - you know that within a split second, the scene can change. There are often just a few brief moments when that "magic spark" appears. Of course this means having your camera on hand and the batteries fully charged and its always a good idea to have back-up batteries ready also. After all, you can't capture the moment if you don't have your camera turned on and ready to go. Remember, you have to be ready to press that shutter button in a moment's notice, anticipating when the magic spark will surface. If you have a digital camera that suffers from a bit of a delay when taking the picture, then you will have to become even more intuitive and skilled at anticipating the moment. Another good tip; make sure you have enough space on your memory card and carry an extra card with you. Too often people will run out of space and either have to delete some photos or end their shooting for the day. Remember, these days’ memory cards are very inexpensive, so pick up an extra one and you’ll be glad you did.
Fill Your Frame
One of the most common mistakes I see in Christmas photos (or any party or event) is that people often end up with shots of their subjects off in the distance on the other side of a room with lots of space all around them. Fill your frame with your subject either by using your zoom or just getting up and moving yourself in closer. While this is one of the simplest tips I ever give it is one that can have the most profound impact on your shots. Try it out, you’ll be amazed.
Don’t Forget Your White-Balance
Now if your totally new to photography, your probably shooting in JPEG format with your camera set to auto and most digital cameras do a pretty good job with auto-white balance, but if you want to get better photos, try setting to white-balance. If you are shooting in RAW mode, you know you can always go back and change it afterwards if you forget.
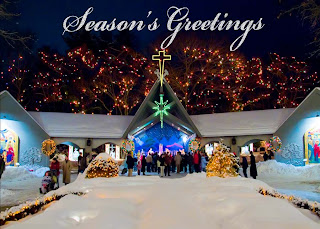
 Photographing Christmas Lights
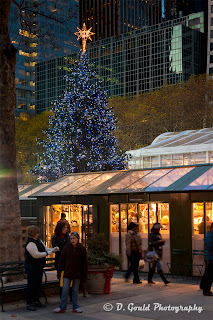
The best time to shoot is before it gets totally dark, plus arriving around sunset will give you time to plan your shot before the good light happens. Try to compose your shots with as much sky as possible, getting down real low. Then, once you get your photo framed, set your white-balance to Tungsten as if you were shooting indoors. All those little bulbs are tungsten balanced and as an added bonus your sky will look even better. Needless to say, you’ll need a way to steady your camera, preferably a tripod or mono-pod or even a beanbag for those long exposures. Plus a remote trigger or cable can come in real handy. Shoot a test shot every minute or so constantly checking the LCD. Somewhere between sunset and full dark your Christmas lights and the ambient light with start to mix beautifully. Usually you’ll have about a 10-minute window with nice light. After that, the good light will fade very quickly and you will know it is gone when your photos start looking like the "bad light" photos you used to take.
Bonus Tips:
If you plan to use flash, nothing screams point-and-shoot like using an on-camera flash. Red-eye reduction is nice, but a shoe-mounted flash is so much better. When shooting indoors, not only can you bounce off of a wall or ceiling you can add a diffuser and make it hard to know a flash was used at all. Of course you might be able to avoid using flash at all by using a nice wide aperture like f2.8 or f/4 and bumping up your ISO a little, but a little fill-flash helps to lighten up your shadow areas and can really add some dimension to your photograph.
Remember, its always a good idea to plan ahead, maybe even making a check list of the things to remember like batteries, extra flash cards etc. Another good tip if you already own the camera, read and re-read your manual and get to know it even better. I can’t tell you how important this is.
Well until my next post, I hope you all have a very safe and happy holiday season and remember, as always, keep shooting and have some fun!


