Well
here we are in mid-November already with only about six weeks until Christmas.
Bah hum-bug. Seriously, I love the
holidays, but they seem to come up way too fast don’t they?
Recently
I was hired by a friend who needed some really quick photos of his daughter for
her yearbook. He knew I was a photographer and had seen my work and asked if I
might be able to help him out. When I say really quick, I mean he needed them
within the week. If this were a normal customer I would charge extra for the
rush job right off the bat, but this was a friend and because he lived relatively
close by, I would try to make time to do it for him.
 Originally
he said he only wanted the one photo for her yearbook and his daughter would
choose which one. If you’re a photographer, you know you’re going to take a lot
of photos and give the customer some choices, which 99% of the time is your
chance for an up-sell. I kind of knew that the parents would probably like
most, if not all, of the shots I showed them and they are the ones that are
paying so it’s up to me to do some selling to cover my expenses. I kind of knew
they would probably choose more than just the one for the yearbook, which ended
up being the case here.
Originally
he said he only wanted the one photo for her yearbook and his daughter would
choose which one. If you’re a photographer, you know you’re going to take a lot
of photos and give the customer some choices, which 99% of the time is your
chance for an up-sell. I kind of knew that the parents would probably like
most, if not all, of the shots I showed them and they are the ones that are
paying so it’s up to me to do some selling to cover my expenses. I kind of knew
they would probably choose more than just the one for the yearbook, which ended
up being the case here.
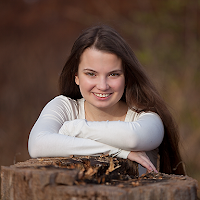
Well
because this was a friend I also waved my normal session fee. Because of the
time constraints, we could only shoot it that Friday or Saturday afternoon
because those were the only times all
our schedules aligned and we decided to shoot at a local park near his home. It
was late in November and I live in New England so most of the leaves on the
trees were gone, so I knew I’d have to be a little more creative with our
shooting spots. I thought I’d use my trusty 70-200 racked all the way out at ƒ
2.8, that way I could just blow out the background for some nice soft bokeh. It
worked nicely and I got some shots I was happy with.
Like
almost every teenager, you have to deal with skin problems. Fortunately, she was
a pretty girl and only had a couple blemishes to deal with. I knew I wouldn’t
have to do any major surgery on her photos, just a few minor touch-ups in post.
Some teenagers need a total overhaul if you know what I mean.
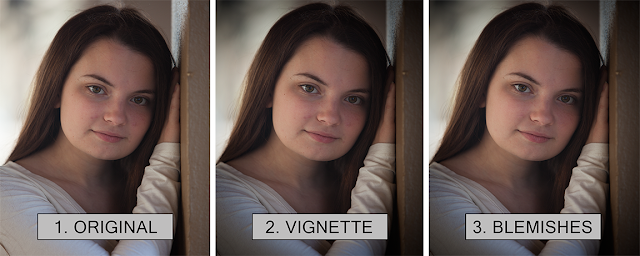
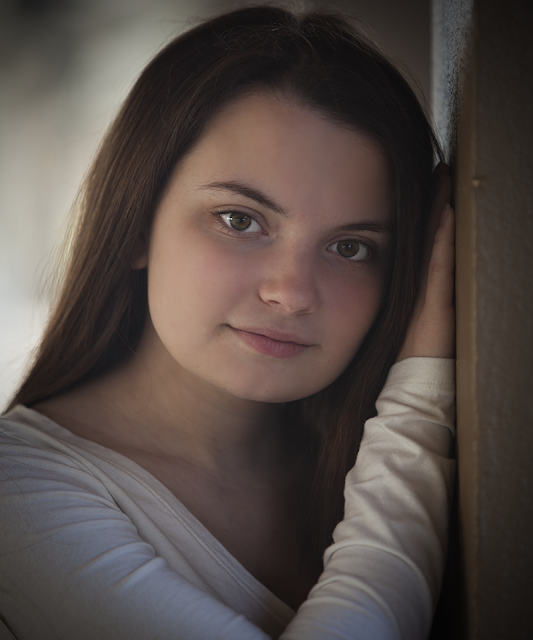
After
taking getting the photos off my card, I reviewed them and did some minor
tweaks to give them some images to choose from. I narrowed their selections
down to about 30 shots or so to choose from. I didn’t know which one the daughter
would choose but I had one particular photo I knew the parents would like and I
did a little photoshop work on that before I showed it to them the next day. I
cropped it tighter, added a nice vignette and softened it up. I kind of knew
that they’d want prints of this one and probably order one matted and framed for
a wall in their home. I was right.
When
I do these types of shoots, I only do minor tweaks on the images before I show
them to the customer. That way I only have to do my magic on the ones they end
up purchasing. When I know what size the final output will be, I then determine
what I have to do to the shots,such as sharpening and softening. When shooting
boys, you process them totally different than girl’s photos. Girls all want
their photos as pretty as possible, most boys want to look masculine.
If you’ve ever shot high school photos, I know you
really appreciate the Spot Healing brush, the Healing brush and the Clone Stamp
tools. How’d we ever get by without these huh? They ended up choosing four poses. I did one set of 4 x 6’s of all the
shots and on the money shot (which I matted and framed) I also included two 5 x
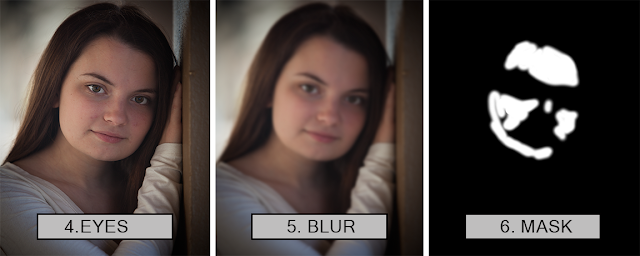
7’s for the grandparents. I usually start off by removing
any acne or blemishes with the Spot Healing brush on a duplicate background layer. Then,
depending on the size I’m printing, I’ll determine how I’m going to soften the
skin.
For
my smaller prints I duplicate the background layer, take out the blemishes with
the spot healing brush, then duplicate that layer and do a nice soft Guassian
Blur on it, and then apply a black mask to hide the blur. Then with my Wacom
Tablet and a nice soft brush, I paint on the mask to reveal the blur layer
below and adjust to opacity until I’m happy with it, to show off the nice soft
skin. Then I highlight the top layer and do a Ctrl+Alt+Shift E to make a copy
of all my layers, I brighten the eyes a little more and do some minor
sharpening, and then I’ll make a flattened copy of it. If I’m doing the printing
I’m all set, but if I’m sending them out I’ll change the color space to sRGB. This
process is quick and easy and takes about 5 mins per image usually. Easy as pie
huh?
 |
|
Of course for my larger wall prints the steps are a little different and require more detail work because you're viewing them from about 3 or 4 feet away, but its still pretty simple. My Final image was cropped for a 8 x 10 in. photo because I knew it was going to be matted and framed. The 5 x 7 in. versions of that had to be cropped slightly different, but you get the idea. Check out the images of my
workflow above. Quick and easy right?
I hope this tutorial helps you with your
photography. This whole package only took about 10 minutes to do. As always,
keep shooting and have some fun!


 When
you open Photoshop the first thing you’ll notice is the new Welcome Screen. I
guess some people might like these, you decide for yourself. One of the
features here are the previews of images that you’ve recently opened. After
you’ve installed the update and opened and closed some images, you’ll see them
on this screen. To see the thumbnails
instead of a list, click on the little icon to change it from list view.
When
you open Photoshop the first thing you’ll notice is the new Welcome Screen. I
guess some people might like these, you decide for yourself. One of the
features here are the previews of images that you’ve recently opened. After
you’ve installed the update and opened and closed some images, you’ll see them
on this screen. To see the thumbnails
instead of a list, click on the little icon to change it from list view.  I’m
not a big fan of these new screens myself.
I did check them out, but I’m old school and I think these things are
aimed more at designers. Unless you turn them off you’ll see them every time
you open Photoshop or whenever you close all your documents. Actually it’s
simple to turn these off. Don’t worry, you can always have it open again if
you’d like.
I’m
not a big fan of these new screens myself.
I did check them out, but I’m old school and I think these things are
aimed more at designers. Unless you turn them off you’ll see them every time
you open Photoshop or whenever you close all your documents. Actually it’s
simple to turn these off. Don’t worry, you can always have it open again if
you’d like. 
 Like
I mentioned, there are a number of changes to this version that you might
really enjoy, such as the customizable tool bar option, sort of like Configurator.
I still like my Configurator Panels and
have a full version of CS6 on my desktop machine so I can use mine.
Like
I mentioned, there are a number of changes to this version that you might
really enjoy, such as the customizable tool bar option, sort of like Configurator.
I still like my Configurator Panels and
have a full version of CS6 on my desktop machine so I can use mine. 


