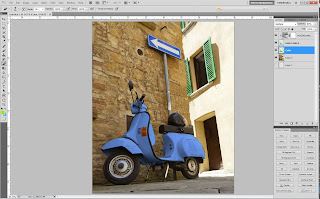
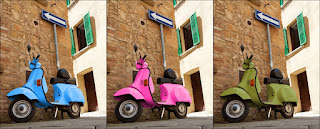
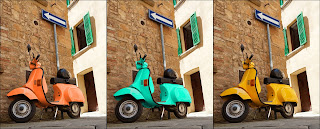
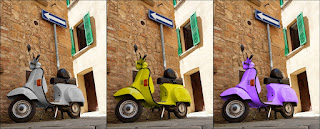
 When I have a pretty simple selection and want to check out different color ideas, there is one technique I like to use to change colors quickly in Photoshop. Like just about everything in Photoshop, there are many ways to get the same result. Using this method, you can change the color of an object in your photos and still change your mind later, because all the work is done on its own layer. You could use Smart Layers and Smart Filters, but by doing it this way I don’t have to use those. I use a pen with a Wacom tablet which makes this tutorial even easier, but you can still follow along if you use a mouse too.
 1. Start by opening a photo with an object that we can re-colorize. First we need to create a new layer but we want to able to change the blending mode of the layer itself, so press Shift-Control-N and you’ll get this dialog box. We’ll change the layers name to Color in the Name box, and then change the Mode in the drop-down menu to Hue. This will control how the color we choose for our new layer interacts with the color on another layer. Doing it this way keeps the lightness and saturation values of the base color (the color in your original photo) and adds the hue of our blend color (our new paint job). Click OK.
Now if you are changing the color of something that is pretty easy to select I’d suggest using the Magic Wand or the Quick Selection tool but if you need a really precise selection, I’d use the Pen tool. If the color you want to change is a solid color and it’s the only shade of that color in the photo, you could use the Selective Color tool. But for this tutorial we’ll make our selection another way, using the paint brush method.
2. Now press (B) to grab the Brush tool and choose a semi-soft edged brush from the Brush Presets on the left hand side of the Options Bar (around 80% hardness). Now we need to choose our new color so click the Foreground color swatch at the bottom or your toolbar and pick your color. You can drag your curser over your photo to choose a color from somewhere in your original photo or you can use the Color Picker box, either one works fine. When you’ve selected a color, click OK.
3. Here is where we work our trick. With your Color layer active, (you might need to zoom in close for extra detail) With the brush, start painting over the object you want to re-colorize. If the object your painting has a lot of black, whites or grays, you can usually paint right over those areas and they won’t change because we are working in Hue blend mode and it won’t affect those areas.
4. Don’t worry too much if you get a little sloppy on your paint job, you can always use the eraser tool later to clean that up. Just press (E) then go up to the Options Bar and change the Mode in the drop-down menu to Brush. Again, use a fairly hard edged brush and zoom in tight. Remember, you can change the size of your brush on the fly by tapping the left or right bracket keys next to the letter P on the keyboard. Adding the shift key when resizing will make the edges harder or softer.

 5. So after you’ve selected a color and painted on your new layer, stop and check it out. Holding the Alt key, click on the eyeball next to your new Color layer and you’ll see only your new paint job layer. (hold the Alt key again and click the same place to show all layers again) Not too happy with that color? No problem, here is an added trick. Go down to the bottom of the Layers Pallette and click on the little black & white circle in the middle called ‘Create new fill or adjustment layer’, then select Hue/Saturation. Now we want to only change the color on our new layer so while holding down the Alt. key, hover over the line right between the new Hue/Saturation layer and our Color layer until you see a little circle shape, then click on the line. This is called clipping and will only allow changes on that layer instead of any other layers.
 Now comes the fun part. Because we clipped those two layers we can do all sort of fun stuff. On the bottom of that panel you’ll see a check box called Colorize. Click it and play around with the sliders. Now unclick and see what colors you get. Remember, this layers blend mode is set to Hue so it is just affects the Hue of the color you chose. Still can’t get the color you want? Create a new layer using the methods above with another color, then place that new layer under your first layer. Play with the sliders and click the Colorize button on and off to experiment. Now play around with the opacity of the first color layer in the Layers Pallette. The possibilities are endless. Notice how the only thing changing is the color of your new layers and not your original layer?
When you get a color you’re happy with, make the top layer in the Layers panel active by clicking on it, then hold down the Shift-Control-Alt keys and tap the letter E. This will create a flattened version of your file on top so you still have all your layers. Now hold the Control key and click on that layers thumbnail (you’ll see marching ants around it) then hold the Control and tap C to copy your image. Don’t deselect yet, click on the File menu in Photoshop and click New. This will create a new file with the same dimensions as your scooter photo. Hold the Control key and tap the letter V to paste your photo into that file (notice only one layer) and then Save it as you like. Now go back to your original photo, hit Control D to deselect it. Now you can delete that flattened layer if you’d like. Now save your original as a PSD and you can come back later and change your colors again……Nice huh?


