 1.
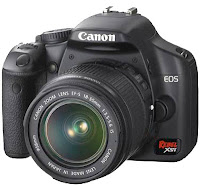
Know Your
Camera – I’ll say it again, know your
camera. Does this sound familiar? These days’ people go out and buy the latest and
greatest digital camera out there, come home, rip open the box, and then
proceed to fiddle with the device. Sometimes they might briefly flick through
the camera manual and then they never look at it again? Not a good idea! If you
buy a digital camera, you owe it to yourself to understand its ins and outs. Take
some time to read the manuals. I always carry my manuals in my camera bag. Learn
how to control exposure, how to use different camera modes and how to use the
flash if it has one. The knowledge you gain about the camera will be invaluable
when you're out in the field taking those special photos. Even if you’re an old
pro and are experienced with photography, every new camera has new and improved
features that will probably surprise you.
1.
Know Your
Camera – I’ll say it again, know your
camera. Does this sound familiar? These days’ people go out and buy the latest and
greatest digital camera out there, come home, rip open the box, and then
proceed to fiddle with the device. Sometimes they might briefly flick through
the camera manual and then they never look at it again? Not a good idea! If you
buy a digital camera, you owe it to yourself to understand its ins and outs. Take
some time to read the manuals. I always carry my manuals in my camera bag. Learn
how to control exposure, how to use different camera modes and how to use the
flash if it has one. The knowledge you gain about the camera will be invaluable
when you're out in the field taking those special photos. Even if you’re an old
pro and are experienced with photography, every new camera has new and improved
features that will probably surprise you.

2. Shoot
in the highest or largest quality file your camera can produce. (preferably
large RAW mode) You can always reduce
the file later, but you can't always make it bigger. Why buy a 16 or 20 megapixel camera if you’re
not going to take advantage of all those pixels? People say they don’t want to
fill their cards up but face it, these days you can get a 16 GB card for as low
as $10 on the Internet. Shooting larger
files also helps if you’d like to zoom in on a specific part in your photo and crop
your shot while retaining a quality image.

3. Rule
of thirds and composition – One of the most popular 'rules' in photography is
the Rule of Thirds. It works like this: Imaginary lines are drawn dividing the
image into thirds both horizontally and vertically, sort of like a tic-tac-toe
game. You place important elements of your composition where these lines
intersect. But like all things, rules are meant to be broken. Sometimes when
you compose your shot, you either need to move your subject around or get in
closer yourself. Try to frame it so that your intended content fills most of
the picture area. Remember, as photographer Rick Sammon says: ”the name of the game is to fill your frame”.

4. Tripods
and Ballheads – I consider these “must have’s” for anyone who wants to try to
take better landscape shots or for taking group photos. They also come in handy when shooting in dim
light to avoid camera shake or when you’re shooting macro style
photography. A couple useful tips when
shooting on a tripod, try to use the lowest ISO and remember to turn off
Vibration Reduction or Image Stabilization on your lenses (if they have this
feature) or else they will try to find some movement and that can also cause
some vibration in itself.
5. Cable
Release cords. If you want really
tack-sharp landscape photos, then you definitely want to use a cable release
cord. Believe it or not, just pushing the shutter button will cause the camera
to move slightly. Remember, if you’re out shooting and forgot yours, you can
always use your cameras self-timer feature in a pinch. These days just about
every Digital Camera has this feature.
6. Get
down to their level - This is a great tip if you’re shooting kids or pets (and
even flowers) Next time your shooting
photos of your kids, get down on one knee (or on the ground) and shoot at their
eye level. You’ll be amazed at how much better your shots look.

7. Lock
the focus – Sometimes your subject is not in the center of the picture, in
these cases, you might need to lock the focus to create a sharp picture.
Usually you can lock the focus in three steps. First, center the subject and
press and hold the shutter button halfway down. Second, reposition your camera
(while still holding the shutter button) so the subject is away from the
center. And third, finish by pressing the shutter button all the way down to
take the picture. Most cameras these days will let you change the focal point
(or points) in the camera for times like this, but I always have my center
focal point active so it’s easier for me to just recompose this way. In these
images of the geese, the red box shows where the focus was locked by the camera.
Using my method will avoid that mistake and ensure your focus is correct.
I personally have all my DSLR's set up for Back-Button focusing which is an even more accurate focusing mode, but that is a whole lesson in itself. To find out about this feature or to see if your camera will allow you to set it up this way, Google Back-Button focusing for your camera model, you just might like it yourself.
8.
Try
to use natural light and take lots of pictures - Digital
cameras are great for this. You can experiment by taking as many test shots as
you like using various camera settings, compositions, etc. You also get instant
feedback by way of the LCD preview screen. If you don't like the shot, you can delete
it right away. For this image of the Christmas tree (taken in Bryant Park in
New York City) I wanted the natural light. I knew I’d have a little motion blur
with the people walking by unless I pumped the ISO out of site so I kept it at
400 and that was ok with me. Remember the rule, “Practice Makes Perfect”.
9. Using flash outdoors - In photography, everything is
about the light. Flash allows you to
take control during those times when you don't have the luxury of great natural
light. Become proficient at carrying and using flash outside and you’ll be able
to take your photography to new heights. Using a little fill-flash when shooting
back-lit subjects can save the day and help fill in all those dark spots, like
under the eyes for example.

10. Take
some vertical pictures – Are you one of those people who never shoot any
vertical photos? All sorts of things
look better in a vertical format, anything from a lighthouse near a cliff, the
Statue of Liberty or your grand-daughter jumping in a puddle. Next time you’re
out shooting make a conscious effort to shoot some vertical pictures too!
These
are just a few tips and ideas to help you take better photos. Look for another
set of tips soon. Like all things, practice makes perfect. Don’t be afraid to take a bunch of shots or
to shoot something different, you might just find your own little niche.
Remember, as always,
keep shooting and have some fun!