When shooting real estate photos I shoot bracketed photos 90% of the time and use various software programs to blend the images. By shooting bracketed shots, I can capture more of the highlights and shadows which help me get a better finished shot. Clear days with some nice clouds are ideal, but that isn’t the case most of the time. Some days you just can’t get to the home early enough in the morning or late enough in the afternoon (depending on which direction the home faces) and you need to have some ‘magic tricks’ in your hat to help you get your shot. In this tutorial I’ll show you a work-around I use in the rare times when I only have a single image to work on. In this case it’s I’ll be using one of my HDR programs to do my magic. I hope you like it.
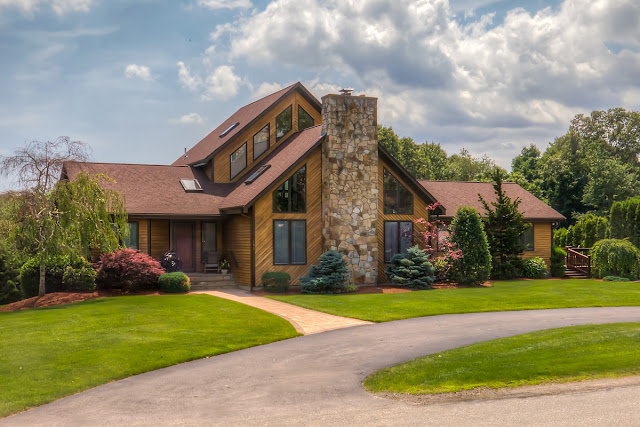
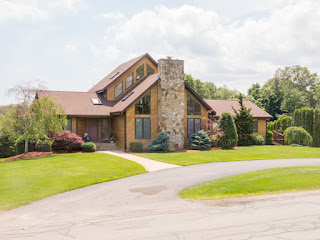
When I’m out driving around, I’m always looking for homes that might make a nice image for my real estate website. Unfortunately on the day I shot this home I was on my motorcycle, I had a camera with me but didn’t have a tripod. It was taken around 2 in the afternoon so I wasn’t able to get a decent exposure on the sky and the front of the home in a single shot but I really liked the clouds and knew it had some potential. If I was going to get a nice shot of this home, I would use one of my magic tricks. To start, I would have to make three copies of my photo so that I could process them like an HDR image. Ironically, this home ended up being on the opening page of my website until I find a home that I like better.
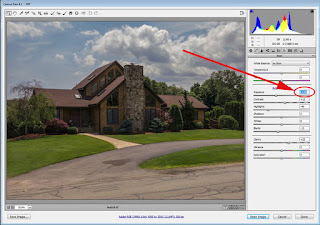 My regular workflow process
starts by opening my original images (in this case my single image) in Camera
RAW and adjusting the Contrast, Blacks and Clarity sliders. After making those
adjustments, I then underexposed it by one full stop and open it as a copy in
Photoshop so I can save it as a TIFF. This image I will name Dark.
 |
| Neutral Copy |
 |
| Over Copy |
 Now I import all three of
these TIFF files into Lightroom CC where I’ll do my magic, in this case I’m
using Photomatix Pro 5.0, but it is currently up to version 5.5. You can also run
Photomatix in Photoshop, but I prefer to use it in Lightroom. Photomatix Pro is one of several HDR programs
I have loaded on my system and each one will get me different results. If you have
this program loaded on your computer, you can go up under the File Menu and
choose it from your Plug-ins.
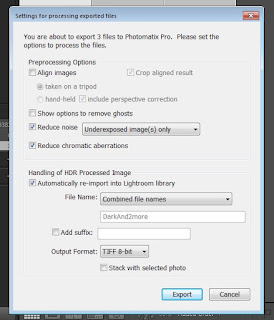
 When I start up Photomatix, it is going to start up and immediately stop. A dialog box will pop open that allows me to set my Pre-processing Options. Check out the image of my settings. I don’t need mine aligned because it’s a single shot, but I do reduce noise and chromatic aberrations. In the section called Handling of HDR, I check it to automatically re-import into Lightroom for me. Then I check 8 bit in the Output Format menu. When I have these all set, I click Export on the bottom and Photomatix will start up and quickly stop again.
 Another
dialog box will open to tell me all three images have the same Exposure
settings according to the Exif Data. Like I didn’t know that huh?
  Fortunately the program allows me to change
them manually in this dialog box. I set the one called Over to +1.0, the
Neutral one I leave alone and the Dark one I set to -1.0. Check out the image. When I’m done changing
those, I click the OK button.
 Photomatix will re-start and does its thing and when it’s done, a screen will open with a bunch of output choices. I check out my choices and in this case I like the one called Default so I choose that and then click on Save and Re-Import box. See Image. Photomatix will then save it as a TIFF in my folder and Lightroom will re-import it for me. When I get it saved I then bring it into Photoshop for my final tweaks.
 When
I get it into Photoshop, the first thing I do is to duplicate my background
layer because I never like to work on my original image. I can see I want to do
some patching on the driveway and the street in front of the house. When I’m
done my patching, I use the Quick Selection tool to select the whole driveway
and sidewalk, then pop it on its own layer and feather the edges a little bit.
Then I’ll use the Burn Tool (set at about 25%) to darken the driveway just a little bit. When
I’ve got all my tweaks done, I darken the whole photo a little bit more and add
some contrast. Finally I crop it down to a 4 x 6 format and trim off some of
the street and then Sharpen it and save it as a PSD file. I then make a JPEG
copy of my file in sRGB mode to deliver
to my clients.
Remember, as always, keep shooting and
have some fun!


