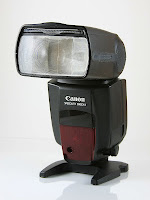
March 14, 2018

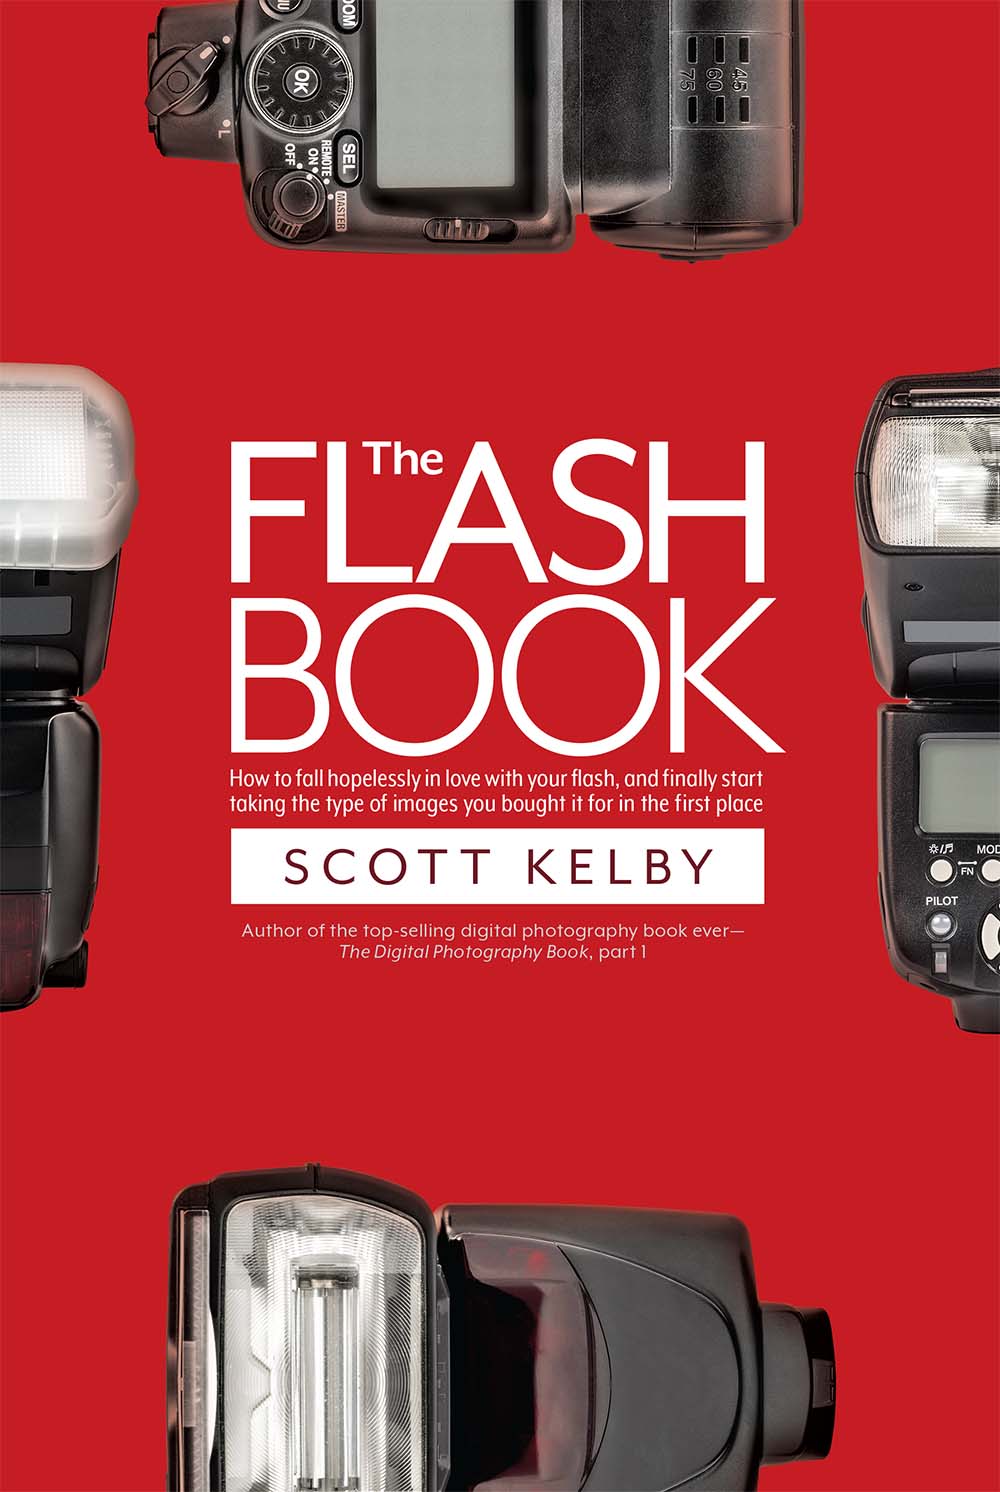
The Flash Book by Scott Kelby

Most of you know that there are a number of books out there today that you can purchase that say they will help you get better at using your speedlights. Unfortunately, a lot of them are just a little bit too technical for most of us (especially when we are first starting out) and they’ll get put on a bookshelf shortly after people purchase them.  Do you have any of these books?  I know I’m guilty of buying a few of these when I first started using flash.  Because I really didn’t understand all of the lingo at the time I didn’t get too much practical knowledge from them. I really wish the Flash Book had come out 20 years ago; it could have saved me years of trial and error!


The Flash Book by Scott Kelby is a very easy to read book and the instructions outlined in it are simple to follow.  Scott has written over 50 books so he definitely knows what he’s talking about. As always, the lessons are straight-forward and laid out in a one or two page style with plenty of detailed info and photos showing the results. He also adds a little bit of his own humor so they don’t get too techy.
This book is very helpful for anyone starting to use flash and even for some of you that have been using flash for some time now. The book is loaded with tons of useful tips and techniques (over 200 pages) that will help beginners get up to speed quickly and finally break their fear of flash photography and get more comfortable with their speedlights.  

The cover says “How to fall hopelessly in love with your flash…” and I don’t know if that will happen for you or not? But I do know this, if you use this book as a study guide, you’ll find yourself getting better shots more consistently and that’s the name of the game!

October 18, 2017

Halloween Photo opportunities

Hello to all my blogger friends. I hope you're enjoying the change of season and getting out with your camera to capture all that Fall has to offer. I feel very fortunate because I live in New England and in my area we definitely have four seasons, each with its own special flavors and colors which makes for some fantastic photo opportunities. Around here, the humid days of summer have given away to crisp cool days with clear air and bright blue skies. These are the perfect combinations for taking beautiful photographs. Not only that, but the sun is lower in the sky providing wonderful long shadows in early morning and late afternoon. So conditions are perfect for photographers - amateur or professional - to get out there and take some great pictures. 
One of the things I really enjoy about the Fall are the Halloween displays and decorations. To me this means everything from all the cute kids in costumes to spooky haunted houses and the eerie glowing jack-o’-lanterns. 


I can remember when I was a kid there were a lot more homes decorated for Halloween than there are these days and personally, I really miss them. Luckily for me, there is one home not too far from me, that is decorated to the hilt every year. This person really gets into Halloween and goes all out decorating his yard and I have come to make it a habit to swing by every year because his home is a must see event. 

When I first found this place, I stumbled upon it totally by accident.  It all began one afternoon in late September a few years back that I had some free time and was out riding my motorcycle. In my travels I happened to be just riding around checking out the foliage, and I saw the homeowner out in his yard setting it up. I saw how much work the guy put into his display and I decided to stop to check it out and speak with the man.


You could tell by his enthusiasm that this was his favorite holiday and that he was really getting into it. He told me that it takes him over a week just to set up his display and that he uses one of his vacation weeks every year just to get it ready. He also told me that he has his display lit up for the entire month of October and he welcomes all visitors to come by and check it out.


This was my cue and I told him I was a local photographer and gave him one of my business cards. I told him that I really loved Halloween displays myself also. I asked him if he would mind if I took a few shots with my point and shoot while I was there and he told me to feel free. All the time I was taking photos, he was giving me the history of his display. We still had a few more hours of daylight so I could only image what it would look like all lit up. 
I told him that I would really love to come back early some evening with another camera and some equipment and take some serious photos. He told me to feel free and come back anytime. Like always, I offered to send him some images and told him that he could go online check them out. 

A few days later I had a chance to go check out his display. The weather was perfect and his yard had everything from witches flying across the yard and zombies and monsters everywhere. It looked so cool all lit up, he really spared nothing. He even had a make-shift movie theater where kids could come by on weekends to see classic horror films like the Wolfman and Dracula. Nice huh?

Well, to make a short story even longer, I’ve been back quite a few times over the years and I still enjoy it. Night-time photography is a tough subject for many people but with a little practice and some careful planning, you can get some really great shots of Halloween displays yourself. For myself, shooting Halloween displays like his, I approach these just like I would any other low light photography situation. For these photos here, I went with just one lens, a Canon 24-105mm ƒ4.0 set wide open, ISO set somewhere between 800 - 1600, with the flash set to rear curtain sync. In situations like this you want to be as steady as possible so I brought along my trusty monopod to steady my camera. I had also brought two external speedlights (with wireless triggers) and a light stand. I had one flash in the hotshoe and the other on the stand, running both with a wireless commander. For the shots here I had to try to avoid getting spectators in my shots. Sometimes that just takes a little patience. When lit correctly, my goal is to avoid shadows and specular highlights whenever I can, but that’s what you always want anyway right? 


Over the years I’ve told a lot of friends and fellow photographer friends about this display and personally I hope he puts it up for many years.  I hope you enjoyed this post and find some interesting things to photograph this Fall in your area also. 
Remember, as always, keep shooting and have some fun!

November 9, 2016

Creative Flash Photography - Book Review


One of the things that will always separate the amateur photographers from the more serious photographers and the pro’s is their use of lights and their lighting techniques.  If you consider yourself a photographer then you already know it’s all about the light right?

How many times do we hear people say they prefer to shoot with ambient light only?  I’ve found that quite often it’s because they get intimidated by using flash, especially off-camera flash.  One of my favorite sayings is by Zack Arias.  He says “Did you know I’m an available light photographer? I look in my bag, see that my Vivitar 285 or a Nikon Speedlite is available to me and I use that”.

Don’t get me wrong, we all love great ambient light, but even when I am shooting in beautiful ambient light, a lot of times I’ll still break out a flash just to add a little dimension and punch to my photos. By adding an extra light source, I can create my own shadows and direct the viewer’s eye to what I think is the photos story. Face it, you can have the best composed shot in the world, but if your lighting is crap, it’s a good chance that your shot will be also.

These days if you want to learn more about off-camera flash there are a thousand different websites and books out there to learn from. By far the best resource on the web for getting the most out of off-camera flash is the Strobist website created by David Hobby. David may have started the Strobist, but there are some other biggies out there like Joe McNally who is another master of off-camera flash. Joe and David actually teamed up a few years ago and toured the US doing seminars on off-camera flash called the Flash Bus tour. Another person I’m a big fan of is Neil van Niekerk and his Tangents blog.  Neil’s written a series of books aimed at off-camera flash that I have written about several times on my blog. If you type his name in the Search Box on this site it will bring up those reviews.  These are just a few names of people I admire personally for their work with off-camera flash. But back to my review…..

Back in July of 2015 I was turned on to another photographer, Tilo Gockel, who also does great stuff with speedlights. He was asked to be a guest blogger on the Photoshop Insider (Scott Kelby’s blog)  Tilo himself comes from Germany and has currently written two books on off-camera flash. His first book was called ‘Creative Flash Photography’ and the second is called ‘One Light'.  I have not read the second book but I can tell you from personal experience, his Creative Flash book is great. If you’re new to off-camera flash (or even if you just want to improve your own skills) these books will definitely help.  

In the book Creative Flash Photography, he has broken it down to 40 lessons, he calls workshops. These richly illustrated, easy-to-understand workshops are filled with recommendations and instructions for flash setups, along with detailed lighting diagrams, and tips and tricks for how to achieve professional looking shots using simple accessories you probably already own. He’ll even show you how to easily achieve high-end studio style shots in your own home with easily accessible equipment and even a few tips on creating your own lighting modifiers and tools. Tilo shows you how to make magic by mastering the use of your own speedlights so you too will be able to create these amazing photographs in any situation.

Mastering your flash is one of the best ways to improve your own photography. Maybe you’re ready to take your skills to the next level?  If you’re interested in either of these books just click on any of the links in this post to get you the best possible price online. Look below the main advertisements to More Buying Choices to avoid paying full price. I loved this book and I’m sure you will too!

And, as always, keep shooting and have some fun!

February 28, 2012

Manual Flash Made Easy

Without a doubt, one of the best features on the latest Speedlights has to be through-the-lens metering, aptly called iTTL on Nikons or E-TTL II on Canons. These flash units fire off a small pre-flash that tells the camera what the distance to the subject is and how much power is needed to get (what it thinks) is a good exposure. This is great when your distance is constantly changing, because it will calculate everything for you on the fly. But what do you do when you’re distance to your subject doesn’t change and you’ll be shooting a number of photos? If you want to get consistent results in that situation, most of the time manual flash will give you the best options. Keep this in mind, when you use manual flash, there are 4 main controls to adjust: 1 - Distance - from the light source to your subject, 2 - Power of your flash (including modifiers), 3 - Aperture and 4 - ISO.


For the most part, it makes pretty good sense why these 4 controls would affect manual flash exposure. You know that if you move your light source in closer you will get more light and you would have to change one or more of the controls - exposure, power or ISO to get a correct exposure right? Now some of you are already comfortable with off-camera flash and this tutorial wouldn’t be for you. But if you are one of those people who freeze up when thinking of adjusting those 4 controls yourself, I’m going to try to help you “make it click”.
Let me start by saying, if you don’t own an off-camera flash, I always recommend getting the best one available for your brand of camera. Granted it will cost more, but it will always pay off in the long run. Getting a speedlight that is cheaper limits you in features and its overall ability. With a Nikon it would be either the SB-800 or SB-900 or the new SB-910, and with the Canon (my own gear) it’s the 580 EX (I or II) Not only do they pump out a little more power and have some other nice features, but they also have a distance scale on the LCD panel (this will help you get consistent flash results) and we’ll need that for this tutorial. Some of you have probably wondered why that was even there in the first place?

I was recently checking out some photos that a friend of mine had taken at a small pageant / festival. The show was set on a stage inside of a local theater. Because people were in the seats all around him he couldn’t just get up and move around so he had to stay stationary and try to get the best shots he could from where he was. He already knew he couldn’t use additional lighting because the theater was filled with people and he couldn’t use bounce flash because the ceiling was about 40 ft high and black. So he attempted to use his speedlights TTL system, but he wasn’t getting consistent results. This is definitely a case where using your flash in manual mode can come to the rescue.
In this case, he knew he wanted some pretty good depth of field, around ƒ5.6 or better, and because it was fairly dark in there and he wanted to keep the quality good, he needed to use at least ISO 400 or higher. The key part of this was that he knew he was staying 20 ft. away the whole time.

Understanding Manual Flash = Distance, Power, ISO & Aperture
When trying to understand this, remember that the ISO and the Aperture are set on your camera; the Distance and Power are set on the flash unit itself.
  1. Right from the start we know we have four controls that we’re going to need to adjust. As long as you are shooting under your flash units max sync speed your shutter isn’t going to make any real difference, so we’ll set it at 1/125.
  2. We know we want some pretty good depth of field and we’ll set that at ƒ5.6.
  3. Now we’ll set our ISO at 400.
  4. Finally, we know we will be about 20 ft. away from the stage all evening.
Keep in mind our flash unit is going to be pointed straight forward all night, no bounce flash etc. Remember, you can’t tilt the flash head up or down or our distance scale disappears from the LCD screen. Now switch your flash to Manual exposure with the Mode button.
 
When you turn on your flash unit it will be set to whatever settings it was in the last time it was used in Manual exposure mode. Chances are it’s not set to 20 ft. We know we have to adjust the flash power to give us the distance we want, in this case, 20 ft. Remember; we just set the shutter speed, the aperture and the ISO.
On the Canon 580 EX I or II, tap the center button of that dial, and rotate the dial. (You will have to continually tap the shutter button to activate the distance readout on the back of the flash.) Now adjust the power of the flash until you get a distance reading of 20 ft.

On a Nikon SB-900, hit the button just below the ‘M’, which appears on the back of the speedlight and adjust it until you get a reading of 20 ft. Now to test it out, take a test shot of something around 20 ft. away from you. Because we’re using direct flash it won’t be the best lighting but we’re looking for consistent light. The shot will be well exposed, judging by how well you guessed the distance, and usually within a third stop or so. These little units are very accurate so if it isn’t on the money, you probably guessed the distance incorrectly.

Now at this point think about what you just did. First you set your cameras aperture and ISO then you reached the specific distance you wanted by adjusting your speedlights power setting. Try this out, change the aperture up or down and watch the distance scale change. The same thing would happen if we changed our ISO.

So what this tells us is that if we changed one of our controls (aperture / ISO / distance) we’d also have to change our flash units output to help us retain the correct exposure. Remember though, you might have to raise the ISO to get a fast enough shutter speed to control movements, but with a little practice this should become almost second nature. Try it out in different scenarios for yourself. Once you try this out a few times it will help make your speedlights more user-friendly. When you get away from using your camera’s pop-up flash and start using a larger flashgun, it gives you tons of new possibilities in lighting. I hope this helps you to better understand your equipment.
Remember, as always, keep shooting and have some fun!
September 16, 2011

Super Rechargables - How to get the most out of your batteries!

I’m a big fan of using off camera flash (Speedlights) and love experimenting with various lighting set-ups. My goal is to get my lighting down to a science, unfortunately when your using Speedlights you will quickly find out that they can really drain batteries in difficult lighting set-ups. For example, if you’re using your flash unit as a main light and have to shoot at f/8 or better to get decent depth of field or when using high-speed sync at full power you can easily eat up the charge in your disposable batteries in no time.

Now granted, if you are familiar with lighting and power ratios, you know that by raising ISO you can lower your flash output to one quarter or one eighth power and then you can get hundreds of pops out of your flashes, (check out the diagram) But at the end of a typical wedding, you will still go through a lot of batteries and that can get expensive. Usually, we tend to think getting rechargeable batteries, Nickel-Metal Hydride (NiMH) to cut down your costs, but the average (NiMH) rechargeables really don’t hold up that long. You’ll find that after they’ve been recharged 20 or 30 times, the recycling time between pops is much slower. When shooting a wedding, I usually try to get all my batteries charged the night before, but you’ll find that they will lose quite a bit of power overnight. What to do now?


Well, I read a lot of blogs and wanted to see what the Pros use out in the field in their flash units. I knew I needed a better solution than the plain rechargeable batteries that I had been using. I found one of the most popular products on the market today is the slow-discharge type battery. I personally use the Sanyo Eneloop hybrid Nickel-Metal Hydride (NiHD). Unlike plain rechargeable batteries, these batteries actually come pre-charged when you purchase them. Plus they maintain over 80% of their charge even after sitting around for over a year! Another nice feature is that they can be recharged up to 1500 times. What that means to you or me is, even if you recharge them twice a week it will take 10 years to reach 1000 cycles!


Now your probably saying to yourself that these must be expensive, but get this, a 4 pack of pre-charged batteries is only around 10 bucks or about the same price as a 4 pack of Energizer rechargeables! But you do have to be careful with how you charge them, some chargers can hurt these batteries and shorten their life span. I dug around online again and found a really highly rated charger, the Maha C801D made by PowerEX. I purchased mine through a company called Thomas Distributing because they actually had great customer reviews and the best prices around. PowerEX puts out their own line of batteries but I found that the Sanyo’s were rated even higher. The model I purchased can charge up to 8 batteries at the same time in under an hour. Plus each battery can be at a different level of charge and the charger actually knows this and charges accordingly! So it will charge your batteries correctly each and every time. You will never over or under charge your batteries again because the Maha will shut off that cell when the battery is fully charged. The charger also features a slow charge setting. The slow charge will automatically drain all the juice from your battery then fully recharge them. The rapid charge does exactly what the name implies; it fully charges your batteries in under an hour! So you can load the charger with 1 battery or up to 8 batteries and it will charge them all perfectly. On the front face of the unit are little power level guides so you know when your batteries are all charged up and ready to go. This charger even recognizes alkaline batteries and won’t try to charge them and risk hurting the unit. With the Maha C801D you can even charge both AA’s and AAA’s at the same time.

Now I aimed this article at off-camera flash fans, but these batteries can be used for all sorts of devices ranging from flashlights to digital cameras, basically anything that uses batteries. The Eneloop batteries are available in all sorts of sizes, not just AA or AAA’s. You can get C, D and even 9V batteries and you can purchase combo packs that come with their own charger if you prefer. If you’re like me and use batteries a quite a bit, maybe its time to check into some of these slow-discharge batteries and save yourself some money in the long run. These days I’ve always got fully charged set of batteries when I need them...........Nice huh?

Hope you find this article useful and remember, keep shooting and have some fun!

September 16, 2010

How to get 100% Reliable Flash – every time!


I know, I know, I get kind of lame when it comes to putting up new articles on this blog. For those of you out there that have blogs and websites that you feed with new info daily, or even weekly, my hat goes off to you. Coming up with new content that you think someone might find useful can often be difficult. Recently I found something that you might enjoy.

For the last five years or so, I’ve been constantly trying to improve my portable lighting techniques and I've found the easiest way to do this is with Speedlights. Of course when you’re in a studio environment, most of the time you’d probably be using Mono-Lights or Studio Flash set-ups, but out in the field or on a remote location, Off-Camera Flash units, usually called Speedlights, are a quick and easy way to get the lighting your looking for with minimal effort.

Unfortunately even these units can be rather difficult to use. You can either ask someone who knows how to use them that might have the time to take you through the process or can try to find the right Internet site (or sites) or read books and magazine articles and devote the time to learn how to use them that way. For myself it’s actually been a little bit of all of these methods.

I actually started out by going online and checking out a fantastic Blog called “The Strobist” put out by a guy who was a 20 yr career-newspaper shooter, David Hobby. David actually created it in 2006 to avoid doing a lecture at a photo class for someone. He quickly found out how many people are into using Speedlights these days, myself included! It has since turned into a full-time job for him and he’ll be the first to admit he spends about 8 hrs a day researching and writing articles to “Feed the Blog”. You’ll find a link to his site on my Blog List also.

Another one of my favorite Blogs to get Off-Camera Flash tips and tricks is a site by a fellow photographer named Neil van Niekerk. Neil’s home base is in New Jersey, but his work these days take him all over the country. Weddings and portraits comprise the majority of his work, but he also holds workshops and seminars teaching digital photography and lighting. Neil also has a great book on Off-Camera Flash and you can click on the Amazon link on this site and type in Neil van Niekerk to check that out. You’ll also find a link to his site – Tangents, on my Blog List.

But now you’re probably saying to yourself, those are great ideas if you’ve got tons of time on your hands, but I just want to be able to take my Speedlight and get the lighting I want quickly and easily without all the fancy lighting ratios and all that creative stuff - Fair enough.

Recently I found a little eBook called 100% Reliable Flash Photography by Edward Verosky. He has a regular website and a nice little blog featuring techniques and tricks for using Off-Camera Flash and I actually found it quite by accident while browsing through another photographers website. I’ll tell you what, I wish he had put this eBook out about 5 yrs ago because it would have saved me tons of trial and error time, not to mention hours of researching on the Internet.

Ed’s eBook is about 75 pages long with tons of useful diagrams and examples of his set-ups and photographs on how he gets his images. He does not get into all the fancy mumbo-jumbo talk, instead he just tells you how to do it quickly and easily. Ed has a technique he calls Standardization, in which he tells you exactly what camera / flash settings he starts with when shooting outdoors or indoors to get consistent results. Of course you can modify these yourself, but it makes your work so easy, you’ll say to yourself “why didn’t I think of that?”

These days, I start with his Standardization settings and then go from there if I want to get a little more creative – just a quick and easy method, ba-da-boom! Like I stated, if your into using Speedlights, either on or off your camera, and want to get quick and reliable results, you owe to yourself to check out his eBook. You’ll find a link right on my site, 100% Reliable Photography.
Remember, as always, keep shooting and have some fun!

May 12, 2010

Captured By the Light by David Ziser

This book is aptly subtitled “The Essential Guide to Creating Extraordinary Wedding Photography”, and for good reason. If you have ever shot a wedding, or were just thinking of shooting one, this book is like the instruction manual for wedding photographers.

Some you of you might not know anything about David Ziser, but his work is very well known in the professional wedding circuit. David has been shooting weddings for over 30 years and because of his skills, he has also been a much sought after lecturer and teacher on the art of wedding photography for many years. His bio reads: “David is an internationally renowned portrait and wedding photographer, and has shared his knowledge with tens of thousands of photographers in five languages and in 14 countries worldwide”. David has also been teaching at Photoshop World for the last few years and when Photoshop World comes to Boston, I always make it a point to catch his lectures.

I enjoy his style of teaching because he lays it out, plain and simple. I especially like his work with speedlights and off-camera flash and this book is loaded with tips and techniques everyone will find useful. He emphasizes the fact that you’ve got to get your flash off the camera because in doing so you will add detail, depth, dimension and color saturation to your images.

His blog; Digital Pro Talk, is one of my personal favorites that I try to read daily. I like the fact that it is always fresh because he submits new articles to it every day. In it he covers everything from camera and flash tips, how to use umbrellas and soft-boxes for lighting effects, some product reviews, some of his own shooting and personal experiences and even sharing his business knowledge and expertise on how to increase your sales and boost your own profits.

In his book, he goes from describing simple posing techniques designed to make your clients look their very best, to tips on how to get the most out of your lighting with speed lights and off camera flash. He describes how and when to utilize front and back lighting, how to get the most out of natural light and even some great tips on composing your shots. David even devotes one chapter entirely to his personal choice of gear – cameras, lenses, and lights and why he chooses those particular tools. His personal choice of equipment might surprise you!

David has two chapters where he takes you out on a sample-wedding shoot and covers everything from packing the equipment to take with you on your shoot, to saying goodbye at the end of the evening. He really covers everything from the alter shots and posing the family, to tips and tricks to boost your own creativity. He then takes you through the whole reception and describes some of his favorite shots to get, and covers everything from the cake cutting, the first dance, and shooting the entire evening right up to packing up your gear at the end of the night. Then, to finish it all off he devotes over 20 pages of sample page layouts designed to get your creative juices flowing.

Granted, these days the weddings he shoots personally are more upscale than the ones we all start off shooting, but his work speaks for itself and has earned him the reputation of being one of the very best in the business. These days his weddings are the cream of the crop and because of that fact, he uses assistants and extra shooters, which can definitely help your creative style, but this book is loaded with tips and tricks of the trade that every photographer will find useful. It’s eleven chapters filled to the brim with over 30 years of experience, laid out in over 275 pages and crammed with tons of beautiful full color images.

The whole idea of this book is to help you make the best possible images so that you stand out from the crowd. This book will show you how you too can deliver an album of treasured memories to your clients that both of you can be proud of. To order this book you can click here: Captured By The Light and get yourself a copy today. So, if you’re a wedding photographer, or just want to be, I know you will definitely enjoy this book…... Remember, keep shooting and have some fun!

April 24, 2010

The Digital Field Guide by J. Dennis Thomas

These days more and more people it seems are getting into photography. Really, if you think about it, the cameras are getting so sophisticated that even people with no experience can take good photos. Granted, not everyone knows how to compose their photos or has a good eye, but these days the new cameras can take most of the guess work out of getting good shots and do most of the work for you. My personal photos have evolved quite a bit over the last 5 yrs or so. I’ve learned new techniques and tricks, have improved my composition, and now I slow down and take my time. With my style of photography, mostly landscape and portrait, I’ve found if I take my time and “set-up” the shot, my photos improve ten-fold. I wrote an article back in December 09’ about a book I was all excited about, On-Camera Flash by Neil van Niekerk. What I didn’t realize was, quite a few people really don’t understand their off camera flashes units that well or know what they are really capable of.

Like a lot of people, when I get a new camera toy, like a Speedlight, I’ll usually skim through the owners manual and then jump right out and start shooting. But you know how that works, I’ll run into a situation where I don’t understand why I’m not getting the results I was expecting and then I go back to square one, the owners manual. This is why I always recommend having your manuals in your camera bag or on your person when you’re out shooting.

This brings me to the topic of this article, a book called the Canon Speedlite System – Digital Field Guide. For those of you shooting Nikon, there is also a book called Nikon Creative Lighting System – Digital Field Guide by the same author, I would definitely recommend these books to help improve your knowledge of these powerful, yet very compact lighting systems. The Canon book came out shortly before the new 580 EX II came out, but the only thing really different on those units is the hotshoe footing and a very slight increase in power.

These books will give you practical knowledge of your Speedlights as well as tips and techniques on Wireless shooting with your 580 EX or 430 EX units as well as using the ST-E2 remote master unit. He gives useful tips on setting up portable portrait studios and on location lighting set-ups. Very useful for anyone trying to get the most out of their off camera flash units. The author also explaind the various types of portrait lighting, like broad or wide lighting, (also called wide or short lighting). He explains the difference between High-key and Low-key set-ups as well as various posing techniques.

One thing great about these books is everything is described in detail and is loaded with diagrams and full-color photos to make learning these techniques even easier. ( I know I need all the help I can get ). He gives tips on photographing pets and children, plus wedding and events tips, how to compose groups and even how to shoot macro, all done with your own Speedlights!

I really can’t say enough about these little books (they easily fit in your camera bags too) These days you can pick these books up right here at Amazon for under $15 dollars. Do yourself a favor and pick one up and remember, keep shooting and have some fun!

April 27, 2009

What's In The Bag?

For some people who frequent my blog, you’ll notice I refer to a few different sites often, and I have a list of my favorite personal blogs that I check out regularly (on the left hand side of this page) and I also reference some of the equipment that I use personally. Every photographer will find the equipment that suits him or her best. Some times I’ll find a piece of equipment that “I can’t live without” while out shooting with friends in the field.
I personally have my own little set-up that covers just about everything I might need while out shooting. I’ve hinted around that I shoot with Canon gear, but that doesn’t mean I have anything against the other brands, its just what I use personally. Every manufacturer has its strong points. I got into Canon totally by accident after joining a camera class, but that’s a story for another blog post.
In my camera bag I have the “stuff” I use regularly. Here is a list of the gear I carry in my bag most of the time. My main camera bodies and four main lenses:
  • Canon  5D Mk II
  • Canon  17 - 40mm   f / 4
  • Canon  24 - 105mm   f / 4
  • Canon  70 - 200mm  f / 2.8
  • Canon 40D
  • Tamron 17-50mm  f/2.8
For each of these lenses I always have a clear UV filter on the end, for safety reasons mostly. I’ve seen expensive lenses get scratched or broken too often, and having one of these on your lens could possibly save you in the case of an accident.

I also have Polarizing filters for each of these lenses as well. These are definitely my most used filters. They are great for reducing reflections (like on water or glass) and for greatly enhancing your colors especially in skies, making your blues deeper and richer.

Another great piece of gear is my Graduated Neutral Density filter set-up. There are a number of different manufacturers that make them, I find that Cokin has the best set-up for me. They are great when shooting landscapes with the sky in the frame. The filter goes from dark at the top to clear at the bottom so you can compensate for the difference in the light. If you’ve ever taken a photo of a beautiful landscape and have either gotten blown out skies or the background had no details, you know what I mean. They can range from one to three stops usually. Here is more info on that: Graduated Neutral Density filters

Sometimes I like to shoot some “poor mans Macro” so I carry a set of extension tubes for that. They help to get really close up details of plants, insects, coins or any tiny objects by allowing you to focus closer. They fit between the camera body and the lens and are made by several manufacturers.

I also carry at least one external flash with a off-camera shoe cord with me. Being a Canon shooter, my main flash is a 580EX II speedlight. These are really useful to help you to take better photos by getting your flash off the camera. On my favorite websites on my blog list is the Strobist, and I check that out regularly. It was created by a man named David Hobby and it is all about shooting with off-camera flash, check it out.

Another few things you should always carry are a small air-blower and a bottle of lens cleaner solution and a micro-fiber lens cloth for cleaning the ends of your lenses and filters without scratching them. I watch people all to often use their shirt or a napkin to clean these and they can actually ruin your expensive gear!

Last but not least is my trusty Hoodman Loupe. These are great for checking out my LCD on the back of my camera. They come in handy when you really need to make sure you got the shot. Often when shooting outside on a sunny day you really can’t see your LCD without one. They are a little rectangular piece of gear that you put up to your eye and then put over your LCD to get complete glare free viewing. They even have a cord to hang around your neck which is very handy. Check them out here: Hoodman Loupe .

Well, that is just a little tour inside my camera bag, hopefully you got some good ideas out of it. Remember it really helps to think smart and travel light. You don’t want to be lugging around a ton of gear with you all the time. A little planning can go a long way.
These are just a few little tips and I hope you find them helpful.
Oh yeah, and last but not least, have some fun!
 
© D. Gould Photography