 This is a technique I like to use to draw the viewer's eye onto
the subject of a photo. I’ve written this post for use with Photoshop, but with
a few variations it’ll work with Elements also. We'll take an ordinary photo, convert it to grayscale, and then place a Polaroid style color picture box on top of
the same image. (it also looks great with a Sepia Background instead of the
grayscale) What really makes this a cool technique is that you can move your
frame anywhere you’d like afterwards while keeping the grayscale photo in the
background….Nice huh?
This is a technique I like to use to draw the viewer's eye onto
the subject of a photo. I’ve written this post for use with Photoshop, but with
a few variations it’ll work with Elements also. We'll take an ordinary photo, convert it to grayscale, and then place a Polaroid style color picture box on top of
the same image. (it also looks great with a Sepia Background instead of the
grayscale) What really makes this a cool technique is that you can move your
frame anywhere you’d like afterwards while keeping the grayscale photo in the
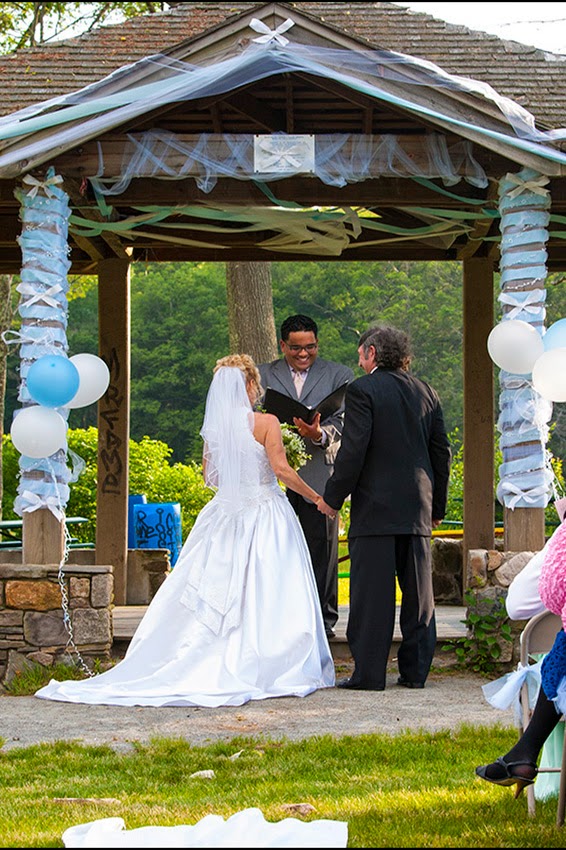
background….Nice huh?We’ll start by opening a photo. Personally, I never work on an original, I’ll open a copy and then duplicate my background layer by Pressing Control J (Ctrl + J) Now I’ve got some distractions in the photo pictured here like the graffiti on the pole and the blue trash barrels in the background. Both of those are quick and easy fixes using the Clone Stamp tool and a little Dodging and Burning. In my end photo they’ll be in black / white (or Sepia) and won’t draw the viewer’s eye in anyhow so I won’t get too nit-picky.
Draw a picture box
Our first step is to create a picture frame box where the color portion of the photo will be. By using a Solid Color adjustment layer, you can always change the size and rotate the picture box later on, just in case we decide to tweak it a little bit.

Tip: If you want it perfectly square, hold the Shift key while dragging or if you want to draw from the center outward press and hold the Alt key. Also, by pressing the Spacebar while dragging, you can move your selection around the photo.
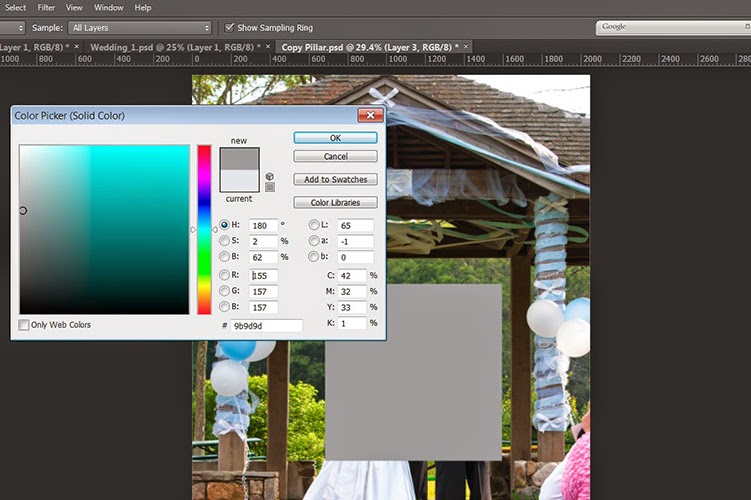
Step 3: Now if you’d like to rotate the frame a little, make sure your mask is selected in the Layers Panel and press Command T (Ctrl + T) for Free Transform. With Free Transform selected, rotate or resize your frame. Press Return to accept when you’re finished.

Tip: While
you still have the Layer Style dialog box open, you can also reposition your
shadow by un-checking the Use Global Light box and then grabbing the shadow with
your mouse and moving it to wherever you’d like.
 Step
5: But I can’t see my photo? No problem. To see our original image inside the
frame, while the Solid Color layer is active, drag the Fill opacity at the top
of the Layers Panel to zero. Now you’ll only see the outline of the box and the Drop Shadow. In
our Layers Panel you’ll notice there is a Color Fill layer with a mask but the
whole photo is still in color. Don’t worry, we’ll fix that now.
Step
5: But I can’t see my photo? No problem. To see our original image inside the
frame, while the Solid Color layer is active, drag the Fill opacity at the top
of the Layers Panel to zero. Now you’ll only see the outline of the box and the Drop Shadow. In
our Layers Panel you’ll notice there is a Color Fill layer with a mask but the
whole photo is still in color. Don’t worry, we’ll fix that now. 

Step 8: Now our image should be in color with a B/W background, but we still need our frame right? Because I might want to tweak my frame later on, click the Create New Layer button on the bottom of the Layers Panel an add a new layer on top of our Adjustment Layer.

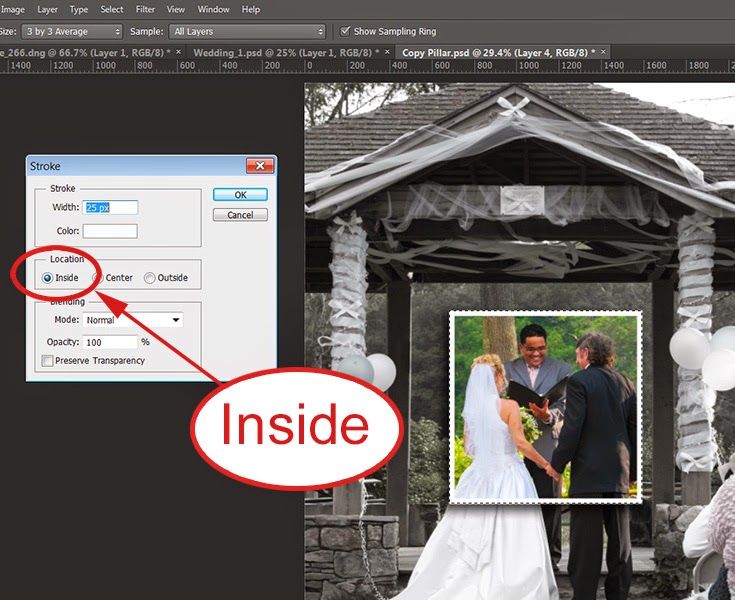 Step 10: With our selection still active, click the Layer
Style ( fx ) button on the bottom of the Layers Panel and
choose Stroke. When that dialog opens, make sure the location in set to Inside
or we’ll have rounded corners on our frame on the outside of our photo. Choose
a color for your frame by double-clicking the Color box. (for this tutorial I
chose white). Now just drag the Size
slider and set your frames width. Pretty easy huh?
Step 10: With our selection still active, click the Layer
Style ( fx ) button on the bottom of the Layers Panel and
choose Stroke. When that dialog opens, make sure the location in set to Inside
or we’ll have rounded corners on our frame on the outside of our photo. Choose
a color for your frame by double-clicking the Color box. (for this tutorial I
chose white). Now just drag the Size
slider and set your frames width. Pretty easy huh?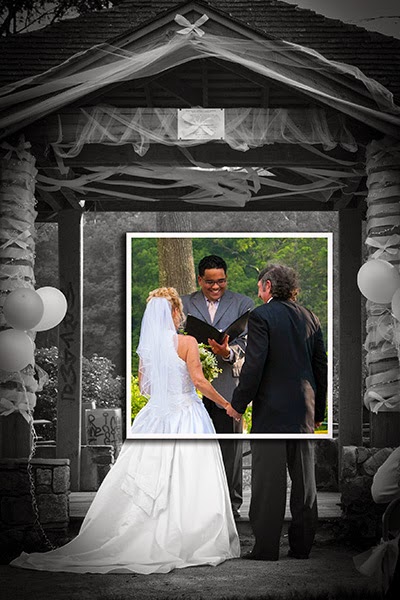 To finish it off I’d
probably add a vignette around the edges and crop it a little tighter, but you
get the idea. Like
I mentioned in the beginning, we can now move our frame around, but like anything
in Photoshop there are usually many ways to do the same thing and here’s my
method.
To finish it off I’d
probably add a vignette around the edges and crop it a little tighter, but you
get the idea. Like
I mentioned in the beginning, we can now move our frame around, but like anything
in Photoshop there are usually many ways to do the same thing and here’s my
method. I highlight the top three layers in my Layers Panel (the New Layer, the Hue / Saturation Layer and the Color Fill Layer) by holding the Control key and tapping and each one. Then I click the little chain icon on the bottom of the Layers Panel to link them together, and then put them in a group by pressing the Control key (Ctrl + G) I then double-click the Group 1 name in the Layers Panel and change the name to Frame to simplify things. Now to move our frame, just make our new Group Layer active, tap the V key to select the Move tool, and drag your frame wherever looks good to you. Nice huh?
I
really hope you enjoyed this tutorial and remember, as always, keep shooting
and have some fun!