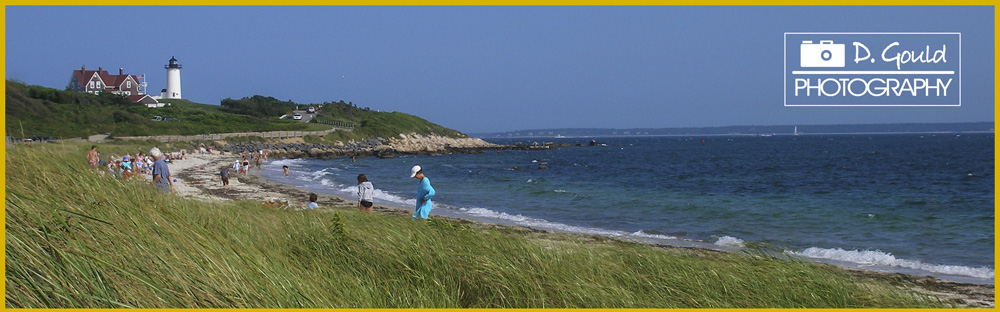
 If you’re like me, you probably have a few of your own images on display around your home or office. I’m not going to lie, some of my prints I really like and I’ve created a way to display them that makes them look like they were professionally framed and matted. Not only that, when you get tired of looking at them, you can change your photo in just a few minutes. This tutorial was designed to be used with Smart Objects and Smart Guides, but will work with almost any version of Photoshop, so if you’re using CS3 or newer your all set.
Take a look at the image above, I use this style most of the time. The total size of the print is 11 by 14inch. If you look at my image, it appears to be double-matted. I’ve got mine framed in thin black metal frame, available at your local craft or frame store, and it gives it a classy-gallery style feel. Here’s a little tutorial that will show you how to create you own in just a few minutes.
1. Start by opening a new document and make it a 14in width by 11in height. Set your resolution to 240, and your Color Mode to RGB or sRGB and the make sure the Background Contents is set to white.
2. On your keyboard, press and hold the Control key (Ctrl) then tap the R key to bring up your rulers. It should be set to inches, if not, right click directly on the ruler and set it to inches. We’re going to need these to help us measure out our two matt layers. Now we want to create our first border.
3. On the bottom of the layers pallette, click the new layer icon or use the keyboard shortcut, Shift, Ctrl + N, when the dialog box comes up, name it Fill layer and click OK. You should see a blank layer on top of your white background layer in your layers pallette now.
4. Here is where our rulers come in handy. Left click and hold the ruler itself on the top of the window and drag a guide down until it reaches the 1inch mark and then let go of the mouse. Now we need the bottom guide so left click the top again and drag down to the 9 inch mark and let go.
5. Now we’ll repeat the same process on the both sides of the document. Left click the anywhere on the side ruler next to the tool bar and drag out a guide all the way to the right side of the document and let go at the 13 inch mark. Now do it again and drag one out to the 1 inch mark. If your guides aren’t exactly at their marks, tap the V key and then you can drag them to the correct spots. You should have 4 guides that form a rectangular shape in the middle.
 6. Make sure your working on the empty top layer. (it will be blue in the Layers Pallette) Here is where we create our first matt border. Tap the M key to bring up the Rectangular Marquee tool. Look in the tool bar and if the rectangular tool isn’t showing, hold the shift key and tap the M key again. Your curser will look like a little plus sign, click directly where your guides intersect in the upper left corner and drag out a box where your guides intersect in the bottom left corner and let go. You should see the marching ants forming a rectangular shape.
 7. Now tap the letter D to set your colors to black and white, then tap the letter X to change the foreground color to white. Now hold the Alt key and then tap the delete key. Your rectangle should be filled with white now. You should see a white box in the middle of your new layer in the Layers Pallette.
 8. We need some layer style effects now and to do some magic. First, go up to the top of the Layers Pallette and set the Fill opacity to 0. To do this you can either click the little arrow or left click and drag next where it says Fill, (this is called a scrubby slider).
 9. Now double-click next to the name on the Fill layer to bring up the layer style dialog box. On the left side of that panel, click the check box next to Inner Shadow, then click next to the name to highlight those style settings (it will turn blue) Copy all the settings from this image. Don't click ok yet.
10. Now click the check box next to Inner Glow in the Styles menu and then click next to the name and highlight those style settings (it will turn blue). Copy all the settings from this image. When you’re done, click OK to get out of that box.
11. You should have a line around the outside edge of an invisible box now. To see what I mean, turn off your background layer (click the eye icon) Hold the Ctrl key and tap the semi-colon (nest to the letter L) to turn off our guides. You should see only an outline of a box right? Now click the eye to turn the background back on and hold the Ctrl key and tap the semi-colon again to turn the guides back on.
12. Now we’ve got to create our template box for our image. With our Fill layer still highlighted (blue) hold down the Ctrl key and click the New Layer icon on the bottom of the Layers Pallette. This should create a new layer underneath your Fill layer. If it doesn’t, just drag that new layer underneath your Fill layer.
 13. Now we need another set of guides to create our image window box. You do remember how to drag out guides right? If not, go back to steps 4 and 5. This new set of guides are going to be on the inside of our other guides. I’ve found they look good to me set at 3/8 in from our other guides.
14. When you’ve got all four sides done, we are going to use the Rectangular Marquee tool again, tap the M key and drag out a rectangular shape on the new inside guides. In other words, you’ll create a box inside of the last box. Now tap the D key to set our colors to default, then hit the X key to change our foreground to white.

15. Make sure your new layer is highlighted and you see the marching ants. Now go down to the bottom of the Layers Pallette and click the Layer Style icon (the little black and white circle) and a menu box will come up. Click on Solid Color at the top. A dialog box will come up, make sure white is selected and click OK.


17. With your mask still selected, hit the Effects icon on the bottom of your Layers Pallette. It’s the little fx, get it - Ef-fects? When the dialog comes up, check Stroke and highlight it, and copy the settings in this image. You want to make sure size, position, opacity are set and your color is set to Black. If the color is not black, double-click it to bring up the color picker dialog box. Don’t worry, we’re almost done now.
18. Now we need our image layer. With your Color Fill layer highlighted, hold the Ctrl key and then tap the New Layer icon in the bottom of the Layers Pallette. It should create a blank layer beneath our Color Fill layer, if not, drag it below your layer.
19. Select an image to use in your template and open it in Photoshop. You have to make sure it’s large enough for frame, preferably somewhere around 12 x 10 at least. When you have it opened, hold Ctrl and tap the A key to select your image. You should see the marching ants around your image. Now, hold the Ctrl key and tap the letter C to copy it, and now click Ctrl + D to deselect the ants.
 20. Now go back to your photo template. Make sure you new layer is highlighted and hold Ctrl and tap the letter V to paste it into our new layer. Your image should be large enough, but if it doesn’t fill the whole image window in the template, press Ctrl and the letter T to bring up the Free Transform handles. Press and hold the Shift and the Alt keys and drag any corner handle to resize it to perspective. Drag it until you see the Free Transform box just outside your last set of guides.
21. Now we need some text, so click the top layer in the Layers Pallette to select it. Then hit the T key to select the Type tool. On the title bar, select Trajan Pro as our font and set it to Regular and 34.5 size. Click underneath your photo to start your text, don’t worry if it isn’t centered yet, we’ll fix that in a moment. On my image it says Castle Hill Lighthouse, yours can say whatever you like it to be, then hit Enter.
22. Now hit Ctrl J to copy that layer and then drag that layer beneath your other Type layer. You can also hold the Ctrl key and tap the left bracket key instead of dragging to place it beneath your other text layer for you automatically. You’ll notice I use shortcut keys all the time huh? Now hit the V key (the move tool) and tap the down arrows on your keyboard until you get your second line of text where you want it. (see original image) Now we need to center everything.
 23. To finish everything off, hold the Ctrl key and click on both Text layers and the background layer to highlight all three of them, then tap the V key. All we need to do is center all our text, so up on the menu bar, click the 5th icon and Photoshop will align everything.
24. Almost finished now. Hold the Ctrl key and tap the semi-colon key to turn off all our guides and take a good look at your new image. Pretty nice huh?
 25. Last but not least, you probably don’t want to lose all this work you’ve done so far, so go to the File drop down menu and click Save As.....name it Photo Template or whatever you prefer. Now you have a completely editable template you can use over and over. Nice huh?
Remember, as always, keep shooting and have some fun!


