
Thinking Ahead – I’ll be the first to admit, sometimes you
get wonderful sunrise and sunset shots just by luck, being in the right place
at the right time. But often times the best ones come out of a little pre-planning. If possible, try to scope out places that
might be good for sunsets when you can, preferably at least a day or two before
your shoot. Look for interesting places
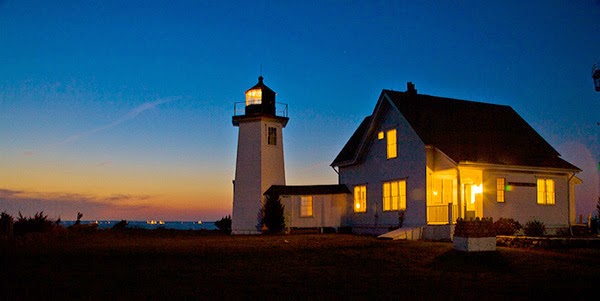
where you might not only be able to see the sun track all the way down but
where there will be opportunities for shots that include foreground elements
and silhouettes. Sunsets only last for about a half an hour altogether so you
want to think about these elements before they start or you might miss the
shots you’re after.
 With the help of the Internet, you can easily find out when
the sun will rise or set so you want to try to get there at least a half hour to
45 minutes beforehand to set up and get ready. Plus, often times, it’s in the
lead up to and the time after the sun appears or disappears that the real magic
happens. Another good tip is
to keep an eye on the local weather reports. There are a variety of different
types of sunsets and sunrises that produce all sorts of different types of
lights and patterns in the sky. Don’t just go for clear days for these shots –
while they can produce some wonderful colors, it’s usually the times where
there are clouds around that the real action happens! Also be aware of places
on days when there is dust or smoke in the air because that can also produce
amazing results.
With the help of the Internet, you can easily find out when
the sun will rise or set so you want to try to get there at least a half hour to
45 minutes beforehand to set up and get ready. Plus, often times, it’s in the
lead up to and the time after the sun appears or disappears that the real magic
happens. Another good tip is
to keep an eye on the local weather reports. There are a variety of different
types of sunsets and sunrises that produce all sorts of different types of
lights and patterns in the sky. Don’t just go for clear days for these shots –
while they can produce some wonderful colors, it’s usually the times where
there are clouds around that the real action happens! Also be aware of places
on days when there is dust or smoke in the air because that can also produce
amazing results.
 If you let your camera meter for you and let it decide what
shutter speed to shoot at you’re likely to get a bunch of crappy shots that
don’t really capture the beauty of the light you wanted in the first place.
Remember, quite often the shot will be under exposed because the sky is still
reasonably light. The great thing about sunsets and sunrises is that there is
no one ‘right’ exposure.
If you let your camera meter for you and let it decide what
shutter speed to shoot at you’re likely to get a bunch of crappy shots that
don’t really capture the beauty of the light you wanted in the first place.
Remember, quite often the shot will be under exposed because the sky is still
reasonably light. The great thing about sunsets and sunrises is that there is
no one ‘right’ exposure.
There are many ways to shoot sunsets and sunrises, so experiment.
You can try bracketing your shots and combining them later in post for some
great results also. To do this, try taking a series of shots at the same ƒ
stop, but play around with the shutter speeds.
Don’t be afraid to try different white balance modes either. Sometimes
when shooting in extreme lighting conditions, some cameras can have trouble
focussing. If this is the case for your camera consider switching to manual
focus. Myself, I like to pre-focus manually and take my camera off auto-focus.
This way I’m almost guaranteed to get nice crisp shots.

Last but not least, a tripod is a must-have for good sunset
or sunrise photography. Sometimes when you accidently come across a beautiful
sunset or sunrise you can improvise and use something to stabilize your camera,
but you really need a nice sturdy tripod. When I’m shooting I always take along a cable release to insure
I get the sharpest photos possible. Remember, most of the time you’ll want good
depth of field so you’ll be shooting at small apertures from ƒ/8 - ƒ/22 or
better and you want to avoid any camera shake if you can. Of course, these are
just some suggestions, but the bottom line is to get out there and practice.
Remember, as always, keep shooting and have some fun!


